How to Cut Down Fall and Winter Energy Costs

admin


It’s nice to thoroughly enjoy the little bit of summer we have left before the breeze starts biting. As the days get shorter though, you should start preparing your house for the cold seasons.


Fall and winter are prime times for energy bills that soar through the roof. But there are ways you can cut down on those costs. Here are some pointers:


Batten down the house

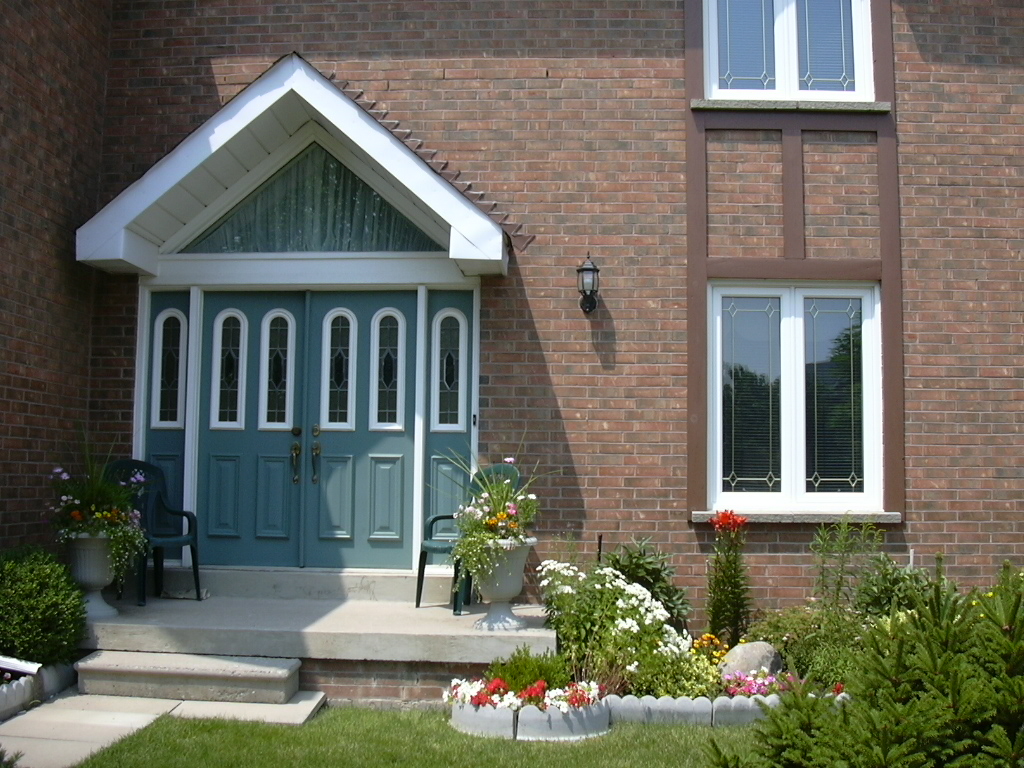
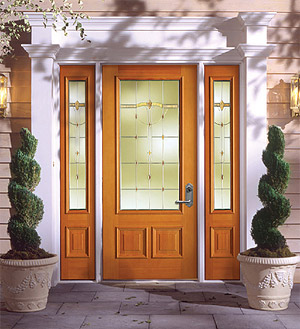
The first thing you want to do is fortify the weather-proofing around the house. That includes taking out the window air conditioner and checking on your windows and doors. If they need replacing, choose a solid door that’s suitable for the climate of your area and install double-pane windows.

Swap out the ragged weather strips on all your windows with new ones. If they’re still in fairly good condition, you can reinforce the window edges with caulking or plastic tape for good measure. Remember to also cover up any air leaks around electrical sockets, pipe cut-outs, and unfinished rooms.

The attic and the basement are prone to much heat loss in the house. Carefully shore up the insulation in both areas. If you’re not sure what insulation options are available, check out this article.


Hang up insulating blinds

There are window blinds with a honeycomb design that create an air barrier as extra insulation. Make sure that they’re measured out exactly so that they hug the window frame.


Seal the fireplace

If you don’t use the fireplace very often even in the wintertime, it’s best to just seal up the chimney flue completely. If you do want to keep the fireplace option open though, install tempered glass doors over the mouth and use an exchange system to circulate the heated air directly into the room. That way, the fireplace is at least heating your home a little more efficiently.


Don’t forget about the small details

It’s the little things in your everyday life that add up! Something as trivial as leaving the oven door ajar after baking to let out the residual heat still helps. Also, experiment with what’s the lowest temperature you can handle. Rather than immediately turning up the thermostat when you’re cold, fill your wintry days with wool! Wear wool socks around the house and snuggle up with wool blankets at night. Of course, if the cold is too unbearable, turn up the thermostat little by little until you’re more comfortable.

Something else you can do is installing a smart thermostat. Program the thermostat to wind down the temperature when you leave for work and to start it back up again as soon as you’re off work. Some smart thermostats can even be controlled remotely on your phone so you can turn it on when you’re almost home.


Switch to LED lightbulbs

LED lightbulbs may have a higher price tag, but they last a lot longer. Where you’ll recoup your costs is on the electricity bill because LED lightbulbs are the most energy-efficient in the industry. Consider replacing all the bulbs in your house with LEDs – even for the Christmas lights!


Set a window covering protocol

Make a habit of opening and closing the curtains or blinds to take advantage of the sun’s heat. During the day, open them up – especially the ones on the south-facing windows – so that the sunshine can heat up the house. In the evening, close them to keep the heat in the house from escaping.


After you’ve done all you can to winterize your home and the days are still warm, go outside and BBQ on!

5 More House Projects to Do in the Summer

admin


You’ve already dusted your hands off from the previous five summer projects? Right on!


Well, for bonus points, here are five more:


Pool and patio deck

You probably want to schedule this project to be done as early as possible at the onset of summer. Then you can enjoy it right away for the rest of the sunbathing days in the season. Summer is also when you can be sure the ground is soft enough to install an in-ground pool. And with the ample summer sun, you can build a deck from framing to staining in a matter of days. Just make sure to factor in the permit approval time when you’re building a new deck.


Landscape the yard

Ever wanted to have a flower bed or your very own rock garden? Maybe you’ve been thinking about some hedges for privacy or trees for shade. Landscaping does a big number in upping the curb value of your home. While you’re at it, why not try to get away from the typical postage-stamp grass lawn? Choose plants that serve useful functions for a yard that’s greener than just its looks.


Renew fence

Your fence is literally the first thing that people see since it’s put up right at the edge of your property. So it’s a good investment to give it a little TLC while it’s nice out. Replace any posts that look rundown and update the fence look with a brand-new paint job. Here’s a cost-saving tip: if you share a fence with your neighbours, ask if they’re willing to chip in half the costs. Chances are, they’ll say yes since they also get the benefits of a sturdy fence.


Kitchen renovations

One of the commonly overlooked effects of kitchen renovations is how you’ll prepare your meals. Sure, you can budget in going out to the restaurant for the duration of the remodel. You can even decide to be budget-conscious and plan out a whole slew of microwaved meals. But if you renovate your kitchen during the summer, you’ve got yourself a third option: BBQ-grilled feasts. Now you have a very good excuse to hold BBQ parties in your backyard every hot evening. That’s the stuff legendary summers are made of.


Maintenance work

Of course, every season has its share of chores for house upkeep and summer’s no different. First up is that BBQ grill. You know, the one you’ll use to host epic BBQ parties during kitchen renos? Yep, that should be cleaned – especially if you see yourself using it a lot this summer.

It’s also a good time to put some detergent in the outdoor trash can and give it thorough rinsing with the garden hose. That’ll get rid of any lingering bits and smell inside. If you have flower pots on your porch or walkway, make sure to scrub the stains underneath and re-position the pots somewhere else.

You also want to improve air quality and circulation at home by cleaning all the air conditioner parts. Do the same with the window screens. And since you won’t be using your fireplace much during summer anyway, take the opportunity to sweep out the soot build-up in your chimney. You should actually do this every three months or so with the help of a professional.

Last but not least, the dryness of summer makes it a lot easier to clear the leaves-and-twigs debris out of the gutters. Make sure to add that task to your list, too.


Now, grab yourself a cool drink and soak up some sun on the new patio deck. You’re well-prepared for whatever the next season throws at you.

Unlocking the Front Door Materials

admin

We tend to focus a lot on sprucing up the interior. It’s natural because we spend most of our time at home indoors anyway. Once we’ve got every room remodeled the way we like it though, it’s time to turn our attention to the house exterior.


The front door is great place to start so that you can upgrade the entrance security of your home as well as let your individuality shine through. Here are the three classic and dependable materials that people often swear by for their front doors:


Wood

Wood doors are divided into two different groups: solid core wood and solid wood. Some solid core wood doors have an insulating polyurethane core clad with hardwood and plywood. The whole frame is then finished with laminate or thinner pieces of plywood. Other styles use engineered wood as the core with a furniture-grade wood veneer on top. The main problem is that they don’t last for long when exposed to the elements as both heat and moisture can cause the plywood and laminate layers to warp. Damages to the surface are hard to fix, too, because you can’t refinish laminate layers. Even if the door uses a plywood finish, they’re often so thin that you can only sand and refinish them so many times. These are run-of-the-mill doors that are designed to be affordable. So if you’re just looking for a basic front door, solid core wood doors will give you that.

On the other end of the spectrum are solid wood doors. Solid wood is the most expensive of all the front door materials. Although it’s still at the mercy of the elements, it’s usually sourced from higher-quality wood that can withstand weathering much longer. Whenever solid wood doors does start to look weathered, you can always sand and refinish them to give another boost of life. With their natural heavy strength, rest assured that solid wood doors will keep your entrance secure. Plus, you’re guaranteed to have a door that’s unique with one-of-a-kind grain patterns.


Steel

When you think of steel doors, you associate them with high-security. And that’s true, to a point. The quality really depends on the gauge of the steel though: the lower the gauge number, the thicker and higher-quality the steel. If you want a solid door, try to get at least a 22-gauge steel door for a sturdy build that doesn’t flex like big-box-store 24-gauge doors. When steel flexes, it chips off the protective paint layer and exposes itself to rust. Another reason to invest in a higher-quality steel is that it minimises dents from blunt forces. Minor dents in steel doors can be pulled out with auto-body repair kits. Larger dents that can’t be repaired that way means you end up having to replace the whole door. The cost of steel doors again depends on the gauge, but they generally cost less than solid wood doors. Something else to keep in mind about steel doors is that they’re not the best at insulation. Although most steel doors have a good insulation core, you can’t change the fact that the metal itself conducts heat. But if you live in a moderate climate and top security is your only concern, then steel doors are a formidable choice.


Fibreglass

Fibreglass doors are the ones you can rely on in harsh climates. Because they don’t warp from moisture and don’t conduct heat, they last a lot longer and are better at insulation. They’re also a great alternative to mimic the look of wood at a much lower price. There are special coating techniques that layer the finishing with similar patterns and depth as natural wood grains. The trade-off with fibreglass doors though is they’re not as secure as the heavy-duty steel or solid wood doors. Fibreglass doors crack easily under heavy impact. If you live in a safe neighbourhood where security’s not an issue and you want an affordable door that can weather the elements for a long time, fibreglass doors are the way to go.


In the end, choose the material that’s best suited for your climate and lifestyle. Then, find ways to put your own personal stamp on it like custom hardware or personality-matching paint so that you can stand out from the crowd.

Making Your Home Kid-Friendly

admin

What’s the ideal environment to raise your children? That’s the golden question for a lot of parents and you’ve probably asked yourself that countless of times. Some swear by giving kids the freedom to play and make their own discoveries. Others prefer a more structured life at home. There’s really no right answer because everyone’s different. All you can do is listen to find out what your children’s needs are so that you can keep adjusting their environment to nurture them the best you can.
One of the adjustments you can always make is to your home. That’s also a tough balance to maintain. Think about what everyone’s daily habits/responsibilities are in your home and what can be changed to ease them. Ideally, the home improvements help make life easier for your kids as they’re growing up while also staying versatile enough to fit with their young adult lives years later. Here are some ideas:


Prepare for wear and tear

Kids are always going to make a mess. They’ve just started learning how to put one foot in front of the other. And it’s not as if grownups are any better because some of us still end up being klutzes after all these years! You don’t have to freak out every time they start wandering around. Just choose materials throughout the house that are sturdy, easy to clean, and can handle anything kids throw at them.

Let’s start with the floors, which get the most use in the house. Lay down carpet or cork for the kids’ bedrooms and play areas (but not if their play areas are down in the basement). In the kitchen where spills are most likely, go with stone/ceramic tile, vinyl, bamboo or cork. Make sure the flooring you choose have non-slip or textured surfaces. Every room is more suited to specific flooring types so keep that in mind, too. If you want to have rugs, consider using outdoor rugs on the inside. They’re usually made of tougher material that can take a lot of damage without being too noticeable.

Invest in some durable countertops that don’t stain and are low-maintenance. Laminate is always a popular choice because it’s inexpensive and won’t be too heartbreaking to replace further down the road. If you want a more durable and longer-lasting choice though, quartz countertops are the way to go. Yes, they’re expensive, but there’s less chance of having to replace them due to damage.


Family central

Kids grow up so quickly and you want to be there to catch every moment. That’s why it’s best to go with open floor plans that allow your kitchen, living room, and dining room to flow into one another. These are the central areas where most of the family hang out during the day. Opening them all up will give you more opportunities to interact with your kids. Plus, you’ll have better sight lines to keep an eye on them!

If you have space, it’s a great idea to install a kitchen island with a sink, food preparation area, and breakfast bar counter. That way, you can chat with your kids while you’re doing dishes and they’re enjoying their afternoon snack. You can turn the kitchen island into even more of a central activity hub by building in a family schedule bulletin/white board at one end, hidden out of sight with a cabinet door.

In the dining room, try using slipcovers to protect the chairs from mess. You can get different sets of slipcovers and switch them out for cleaning or special occasions.


From accessibility to DIY

It’s only a matter of time until your kids naturally get curious about what’s inside all the drawers and cabinets in the magical land of the kitchen. Encourage their curiosity without any worries by stocking the lower drawers with contents you’re okay with them handling. This can include dishes, too! It may seem like a bad idea at first, but if dishes are stored in lower pull-out drawers, they’ll have an easier time reaching them. It’s especially useful if you put the dish drawer(s) right next to the dishwasher so you can encourage them to start doing things themselves while helping you put dishes away.

Continuing on the DIY encouragement path, place snacks and food that your kids are allowed to eat in the lower pantry shelves. Anything you don’t want them to touch can go on the higher shelves. Do the same with your refrigerator. If you have a large refrigerator with many drawers, designate specific drawers to hold fresh food for each of your children’s tastes. By making healthy snack ingredients accessible for your kids, you set them on a good path to start learning how to take care of themselves. It’ll make your life easier, too, while you’re at it.


Clear the traffic jam

Getting your kids ready for school while getting yourself ready for work is always a struggle. Over the years, you’ve probably refined an efficient routine to get the morning chaos under control. To streamline everything even more, clear up the waiting times for everyone’s turn at the bathroom. Either add a second bathroom or install a double-sink vanity in the current bathroom if possible. Also, put in a storage closet/cabinet to better organise everyone’s toiletries and reduce the frantic hunts for something someone else misplaced.


Above all, try to remember what it felt like when you were growing up. It’ll help you see the world through your children’s eyes. And remind you how awesome kids are.

4 Insulation Options for Your House

admin

There’s nothing like coming back to a warm, cozy home at the end of a long day. You can finally change into your PJs, put on your fuzzy slippers, turn up the thermostat, and curl up on the couch with a nest of blankets and pillows. You may sometimes feel though that all the fuzziest slippers in the world and all the heat you can blast do nothing to keep away the shivers. That’s when you realise your house is poorly insulated (or that you may have a cold, in which case you may want to hibernate for a bit with some medicine).


It pays off to get a professional to evaluate the energy efficiency of your home – especially to figure out where to shore up insulation. Poor insulation leads to heat loss and money drain on your utility bills. Of course, it’d be nice if insulation were already built into the original plans of your house when you bought it – and there are ways to do that with new builds.


To fix the insulation inefficiency in your existing house though, here are some options you can choose from:


Blanket

Packaged in batts or rolls, this the simplest and most common insulation option to put in. Blanket insulation is designed to be easily cut on the spot to fit between studs, beams, and joists in unfinished walls, floors, and ceilings. There should also be a snug fit – but not too jammed – in the irregular spaces around electrical outlets, wiring, and pipes. Blanket insulation is usually made with fibreglass. You can also use cotton, which is a greener option sourced from denim and textile plants. Rockwool is made from recycled materials and is easier to install because of its shape resilience between studs.


Foam boards

Foam boards are often made of polystyrene, polyurethane, or polyisocyanurate.  With this heavy-duty insulation option, you can install them practically anywhere in the house. Most importantly, foam boards have a very high insulating value that can cover both interior and exterior walls. It’s more effective to use them on large surface areas though so that’s a drawback in an existing house without a major renovation.


Loose-fill

You should use the loose-fill option only as a supplement to more structural insulation rather than as a standalone. Specialised equipment blow or pour loose fibre particles into awkward spaces to fill up any insulation gaps. One common fibre particle material is fibreglass, suitably lightweight for attic ceiling applications. Another material is cellulose, a denser combination of recycled paper and cardboard for walls and floors.


Spray foam

Spray foam is also made for tight spaces, but has a higher insulation value than blanket insulation. The great thing about spray foam is that you can scale it up to cover large surface areas, too. Spray the polyurethane foam out in liquid form it’ll quickly fill up the space around it before hardening into an insulating layer. For a lighter, cheap option that creates an air barrier, you can go with open-cell spray foam. If you want a denser option that creates both an air and moisture barrier, choose the more expensive closed-cell spray foam.


Many of these insulation options need professional installation and access behind finishings. For greater efficiency, your local contractor can combine the insulation fix with your next renovation. And don’t forget to apply for some funding beforehand if you’re on a roll to maximise energy cost-savings in your home.

Picking the Right Baseboards

admin

After you’ve covered flooring in your house based on the function of each room, it’s time to pick the right baseboards to go with it. From a practical point of view, baseboards help hide the gap between the flooring and the walls; for aesthetics, think of baseboards as the bridge that connects your flooring to the rest of your home’s interior design.


Just like flooring, there are also a lot of options to choose from for baseboards; unlike flooring, however, you can make your choice based mostly on their looks. Here are the different baseboard materials you can select:


Medium density fibreboard (MDF)

MDFs are made from wood fibres sealed together with a resin mix. This manufacturing technique allows them to be moulded into a variety of shapes. One of the most economical and versatile materials you can go with, MDF baseboards come to the shelf already primed to be painted. If you want your baseboards painted in a specific solid colour, then MDF is your go-to material since it’s specifically designed for a paint finish. The best way to decide on a paint colour is to choose one that matches the major colour in the room’s décor or one that contrasts with the major colour. By the way, don’t even bother staining MDF baseboards because it’s not worth the effort: although MDF baseboards are made of wood fibres, there are no natural wood grains to accentuate, which defeats the whole point of staining in the first place.


Natural wood

If you have your heart set on staining, then look no further than natural wood baseboards – they look especially good paired with hardwood floors. You can either get the less expensive softwood baseboards like pine and poplar or you can get the more expensive hardwoods like cherry, oak, and walnut. Pine and poplar have very fine wood grains that don’t stand out very much even after staining; however, they are great options to achieve that rustic look. You can even paint pine and poplar, too, after you’ve primed them, but if you’re going to do that, you may as well go with the cheaper MDF baseboards – you won’t notice much of a difference after a few coats of paint. For hardwoods with their deep grains, staining is the only way to go – and boy, what a visual impact they make when it’s all done. Stained hardwoods bring a classic elegance to interiors that’s at once timeless and warm.


Vinyl

Vinyl baseboards are manufactured in rolls and are applied with industrial glue – it’s one of the easiest baseboards to install. One major advantage vinyl has over MDFs and natural wood is that it can handle moisture very well. It’s also durable and weathers wear and tear much better than wood. The only downside is that they can’t be painted, but with the wide range of pre-set colours you can choose from, that may not be a problem.


Plastic

Plastic is another water-resistant baseboard material you can use. It’s versatile in available shapes and it can be made to imitate wood. It can even be painted in any colour you want if you use paint that bonds to plastic. With their easy installation and maintenance, plastic baseboards are a great choice that’s less expensive than both vinyl and natural wood – as long as you don’t mind baseboards that look…well, plastic.


Tile

Although not as popular as the other baseboard materials mentioned above, tile baseboards deserve an honourable mention. The truth is: they’re not popular only because they fit just with tiled floors and are expensive to install. If you have tiled floors though and don’t mind spending a little extra to put in tile baseboards, you’ll elevate your room to a pristine luxurious level. Tile baseboards are extremely durable and water-resistant after they’re sealed. They’re also maintenance-friendly and very easy to clean. What’s more, they make the room feel larger because they create the illusion of the floor tiles extending out and up to the baseboards. Tiled baseboards bring a feeling of palace magnificence that cannot be matched by any other material.


With baseboards, you can customise the material and even the shape or trim profile to whatever fits your style and budget. The only thing to keep in mind is to maybe only use water-resistant materials in the bathroom and high-humidity rooms; otherwise, go nuts with the look that you like!

Flooring Types and Their Ideal Rooms in the House

admin

Flooring installation is one of the renovation phases where it pays to spend some extra time considering all the angles of the material options available to you. Of all elements in your house, flooring is probably going to suffer through the most wear and tear because there’s no way you can make light use of it. Someone is always going to run late and scuff it up; something is bound to get dropped or spilled on it; kids will somehow find creative ways to decorate it with their boundless imagination.


Because of people’s diverse foot traffic needs, there’s a lot of different types of flooring to choose from. A good way to help narrow down the choices is to look at some of the most common flooring types and determine which rooms in the house they’re most suited for:


Carpet

Carpet is the most bare-feet-friendly of all the flooring types. It’s soft and feels warm between your toes, especially in the morning when you finally work up the courage to crawl out of your warm bed. It also makes a room feel more cozy and inviting. Just don’t install carpets in moisture-rich and spill-prone areas. They’re ideal for:

  • Bedrooms
  • Kids’ Playroom
  • Living Room


Hardwood, composite wood, or laminate

Hardwood is made from the timber of hardwood trees and has a long lifetime since it’s very durable with a surface that can be refinished periodically to hide accumulated scratches. Composite wood is a cheaper alternative to hardwood and doesn’t last as long since it’s actually made of layers of compressed wood particles sealed with a hardwood finish on top. Laminate is a synthetic material with a resin-and-fibre core that’s often used to simulate hardwood flooring by laminating its pattern on top. Again, all of these materials don’t hold up well in wet areas so they’re better suited for:

  • Bedrooms
  • Dining Room
  • Hallway
  • Living Room
  • Office


Stone or ceramic tile

Stone tiles are hewn from natural stones such as granite, marble, limestone, and slate. It’s an expensive but highly durable luxury flooring that requires sealing after a labour-intensive installation. Ceramic tiles are made from glazed ceramic that’s just as durable and not as costly. Stone and ceramic tiles bring a touch of class to the house, but are not very comfortable to walk with bare feet since they’re always cold to the touch and slippery when the floor is wet. Both issues can be solved though if you get tiles with a textured, non-slip surface and put in radiant heating under tiles installed in wet areas; that way, you’ll always have sure footing on a heated tile surface that quickly dries up any small puddles that were missed. Both tile types are easy to clean (though stone tiles do take a little more work with regular sealing needed) and are best for high-traffic, wet, and dirt-prone areas or areas where you want to show them off as key design features. Install them in:

  • Atrium/Entranceway
  • Basement
  • Bathroom
  • Dining Room
  • Kitchen
  • Living Room


Vinyl

Vinyl is made from a synthetic polymer material that produces a resilient, rubbery surface that can absorb a lot of impact from non-sharp objects. Any dents from sharp objects can be removed by simply replacing the damaged tile since vinyl tiles are very easy to install. It’s also easy to clean and is water-resistant. The material vinyl is made from though means there’s a risk of it releasing volatile organic compounds (VOCs) over time, which adversely affects air quality; if that doesn’t bother you, it’s a low-cost flooring type that’s good for:

  • Basement
  • Bathroom
  • Dining Room
  • Kitchen
  • Laundry Room


Bamboo or cork

Both bamboo and cork flooring are made from sustainable, renewable materials so they’re great if you’re looking for eco-friendly flooring options. On top of that, they’re both extremely durable – just as tough as hardwood floors, if not more. Cork even has a little bounciness to its surface, which allows it to absorb impact and makes it more pleasant to walk on. Similar to hardwood, both materials are not recommended for wet areas. Bamboo is a little more water-resistant since it’s a type of grass that thrives in water so it can be installed in slightly humid area like the basement; it will suffer water damage though if large puddles are not mopped up right away. Bamboo and cork are ideal for:

  • Basement (bamboo only)
  • Bedrooms
  • Dining Room
  • Kids’ Playroom (cork only)
  • Kitchen


Narrowing down flooring options based on practicality is a good starting point. Some flooring types are easy to install and can be DIY projects, but if you decide on higher-end flooring types, always get a professional from your general contractor’s team to do it so that they’re installed properly and without risk of potential damage.

Why Hire a General Contractor?

admin

It’s a classic question that comes up time and time again. Many DIY homeowners are used to doing their own renovations around the house and it’s natural for them to want to retain that autonomy by dealing with sub-contractors directly on bigger projects. In addition, one of their main motivations for going without a general contractor comes down to cost: why fork out extra money for a general contractor when I can just tell a sub-contractor exactly what I want myself?


What’s missing in that picture though is by focussing solely on cost, the value of what a general contractor brings gets lost. There are several benefits – both tangible and intangible – to working with a general contractor that are often overlooked, but are important to keep in mind:


Project management skills

Renovation projects – especially large remodels – are much more than just telling the sub-contractors what to do. There are many pieces to the puzzle like how long each sub-trade takes, the most time-efficient order to schedule them, and how best to re-shuffle priorities on the fly when unexpected problems crop up. General contractors have to understand how all these puzzle pieces fit together inside-out because if they don’t, it means wasted time that leads to unfair extra costs for the client and loss of future business for the general contractor. So the project management skills that general contractors draw on to keep a renovation project on track are built from the need to succeed in a competitive business; when push comes to shove during a crisis, the value of skills honed out of survival necessity will become that much more apparent.


Knowledge of current construction codes

General contractors also keep on top of all the current construction industry standards so you have peace of mind knowing that your renovation project is built to code. Individual sub-contractors may very well complete their parts of the project up to code in their trade, but a licensed general contractor will also consider the impact of sub-trades on each other and make sure that the combined product of the project is code-compliant as a whole.


Maintaining product warranties

One of the tangible benefits of using a general contractor is the fact that some construction products or materials actually require a licensed contracting professional to install them if you want their warranties to still be valid. This benefit alone would be a huge cost-saver if ever you have the misfortune of having to deal with a product defect.


Insurance and workers’ compensation

This is a mandatory cost of doing business for general contractors. What it means for you is that you wouldn’t be liable for any damages or injuries that occur on your property during the course of the renovation – everything would be on the general contractor, including the responsibility of making sure all sub-contractors are licensed and insured. If you’re managing sub-contractors yourself and just one of them actually turns out to be unlicensed and uninsured, you could be held liable for any damages/injuries as a result of that sub-contractor.


Industry connections

General contractors are always in the know of who the trustworthy tradespeople are as well as what fees are reasonable for their services. Another crucial advantage of using a general contractor is that they know exactly who to call and how to go about pulling permits quickly enough for your renovation project to stay on schedule. Often times, it’s the general contractor’s list of contacts that’s worth its weight in gold.


Quality guarantee

Last but not least, we get to the key benefit of using a general contractor: quality guarantee where if the renovation final product is not satisfactory, the resulting fixes/repairs would be on the general contractor’s dime.  Although many sub-contractors also offer quality guarantees, consider this scenario: if a sub-contractor’s repair requires taking out a different sub-contractor’s finished product, you will most likely have to suck up the cost of getting that second sub-contractor to re-do the work after the repair. If more than one trade gets affected by the repair, it could end up being a very costly domino effect for you. With a general contractor, of course, every repair and its repercussions would be borne by him/her.


At the end of the day, the decision on whether to hire a general contractor or not rests on how far people’s DIY comfort level extends to. Like any major decision though, it’s important to weigh the pros and cons of both sides before choosing one – and you’re already off to a good start with this handy article on the value of hiring a general contractor!

How to Prepare Your House for Remodeling

admin

You’ve spent pretty much an eternity building up that dream home in your mind, you’ve got contractors lined up, and you’d like nothing better than to have your dream home just appear already. Time works a little differently outside our head though, unfortunately; that means we have to prepare ourselves to put in a lot of patience. Unless you have a magic wand, of course, in which case you don’t even need to read this. For those of us who don’t have a magic wand though, there are steps we need to take before contractors can start work on remodeling the house.

The simplest way to break down the remodeling preparation process is to group all the steps into three separate sections:


Scheduling

Some renovation projects are best done in certain seasons so try to schedule them during those times. For example, winter is usually for inside renovation projects only while outside renovation projects can be scheduled in spring, summer, or fall. There are some outside projects that should be done in a specific season though:

–    Window replacement and door replacement should be done in spring to fix any problems that came out of the winter cold

–   Deck-building, siding, and roofing work should be done in summer to minimise the risk of wet weather damaging your house

–   Chimney repairs and any projects to winterise your home should be done in fall so that your house is ready to withstand the coming winter.

Next, adjust your personal schedule to make sure you’ll be in town during the renovation. This just means not going away on vacation so that contractors can check in with you in person throughout the renovation process; it doesn’t mean you need to take time off work though as contractors will accommodate your work schedule.


People

Let your contractor know what communication method is the best way to reach you (i.e. phone, text, e-mail, etc.). Provide your contractor with secondary communication options as well just in case the first one doesn’t work. This way, both you and your contractor will have peace of mind knowing that you have open, reliable communication channels with each other. Next, confirm that the contractor will take care of the permit process for the renovation. Let’s be honest: the contractor has done this way more often than you so just trust your contractor to know all the ins and outs to streamline the process. Also, let the contractor know whether or not you’re okay with the renovation crew using your bathroom. Contractors usually bring a portable toilet for big renovation projects, but it may not be the case for smaller ones. If you have a spare bathroom, feel free to offer that up. At the end of the day, it’s really up to your comfort level to make that decision, but it does make it much more convenient for the contractor if you allow the crew to use your bathroom. Finally, tell the contractor which areas in the house are off-limits and that you’ll also tape the areas off with signs to identify them.

Notify your home insurance company about the renovation and ask them if they have any suggestions on what else you need to take care of before and after the renovation. Their suggestions are given often because they’ll affect your insurance policy so do your best to follow them.

The next people you need to communicate with is your family. Discuss with them how the renovation will change the routines for everyone in the house and come up with creative ways to work around disruptions. This is also a good time to highlight safety measures and precautions to take during the renovation period – especially if you have children in the house. Sitting down with your family to have these discussions is important because it reassures them that you’re all in this together, coming up with solutions to only temporary disturbances to home life; it’s what will keep the family sane and focussed on getting one step closer to the dream home, instead of letting the stress of renovation get the better of everyone.

Lastly, give a courtesy heads-up to neighbours on both sides of your house that you’re doing some renovation work on your house and ask them to please bear with you for the next few weeks. This step is optional and it really depends on your relationship with your neighbours. You’re definitely not obligated to notify them of renovation work, but it is a nice, friendly gesture that they’ll appreciate.


Possessions

Wrap all your antiques and fragile items with padded materials like bubble wrap or blankets. Store them somewhere safe away from the renovation site, maybe in an unused spare room that won’t have any renovation work done in there. Lock up all your valuables and jewelry in a home safe or, even better, a safe deposit box. Move all your furniture out of the renovation site and into that unused spare room; if some furniture pieces can’t be moved, cover them completely with plastic sheets, tarps, or cloths to prevent construction dust from getting all over them. Take away any remaining loose items still left on the site.

Clean up the site before the contractors arrive. If you’re doing your own demolition, finish that before doing the clean-up in advance of the contractors arriving. Last but not least, run tape across the entrances of all the areas in the house that you’ve identified as off-limits and stick “Off-Limits” signs to the tapes.

That’s it – you’re now prepared for the remodeling work to begin on your house!

What are some other steps you like to take to prepare your house for remodeling? Share the steps you took and tell us why it was important for you on that project!

1 2

WE LOOK FORWARD TO HEARING FROM YOU

Ready to take it a step further? Let’s start talking about your project or idea and find out how we can help you.

Close

REquest A Free Quote

Curabitur blandit tempus porttitor.
Sed posuere consectetur est at lobortis.


[recaptcha]

error: Content is protected!
Call Now Button