Don’t Fall Into These 6 House Remodeling Traps!

admin


While the opportunity to remodel your home is definitely exciting, it pays to look before you jump. That’s because there are some expensive traps you don’t want to get caught in:


Stretching your budget to the limit

The future is unpredictable and the only way you can factor in what can go wrong is by setting aside a cushion to help you weather the storm. So when you come up with your budget, it’s vital that you leave room for a contingency fund.


Skipping detailed quotes from contractors

When it comes to big-ticket items like remodeling your home, there’s no such thing as too much information. You need as much information as you can get to make informed decisions that will net you the renovation results you want. So don’t be afraid to ask contractors to break down their quotes line by line.


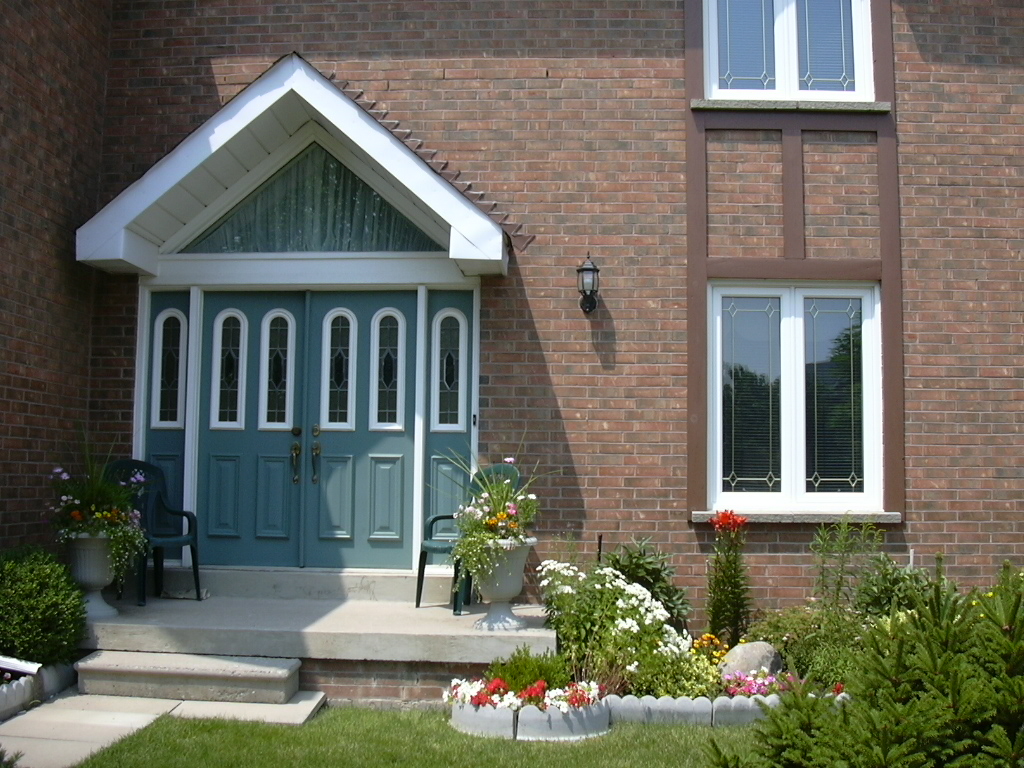
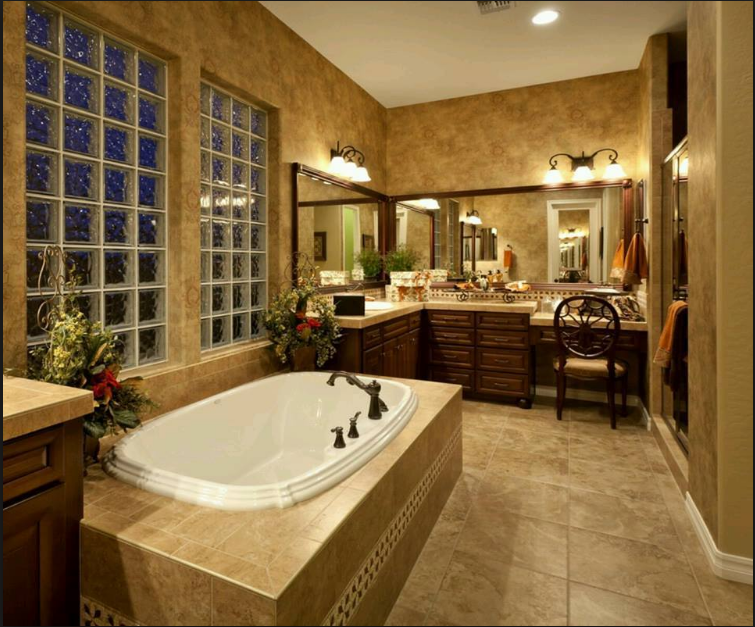
Paving over existing architectural details

Remodeling a house doesn’t mean demolishing everything old to make way for the new. Take a step back to look at the existing architectural details of your home and point out the ones you find attractive. This approach helps you preserve some of the original charm of the house and its architectural style as you complement them with your personal touch.


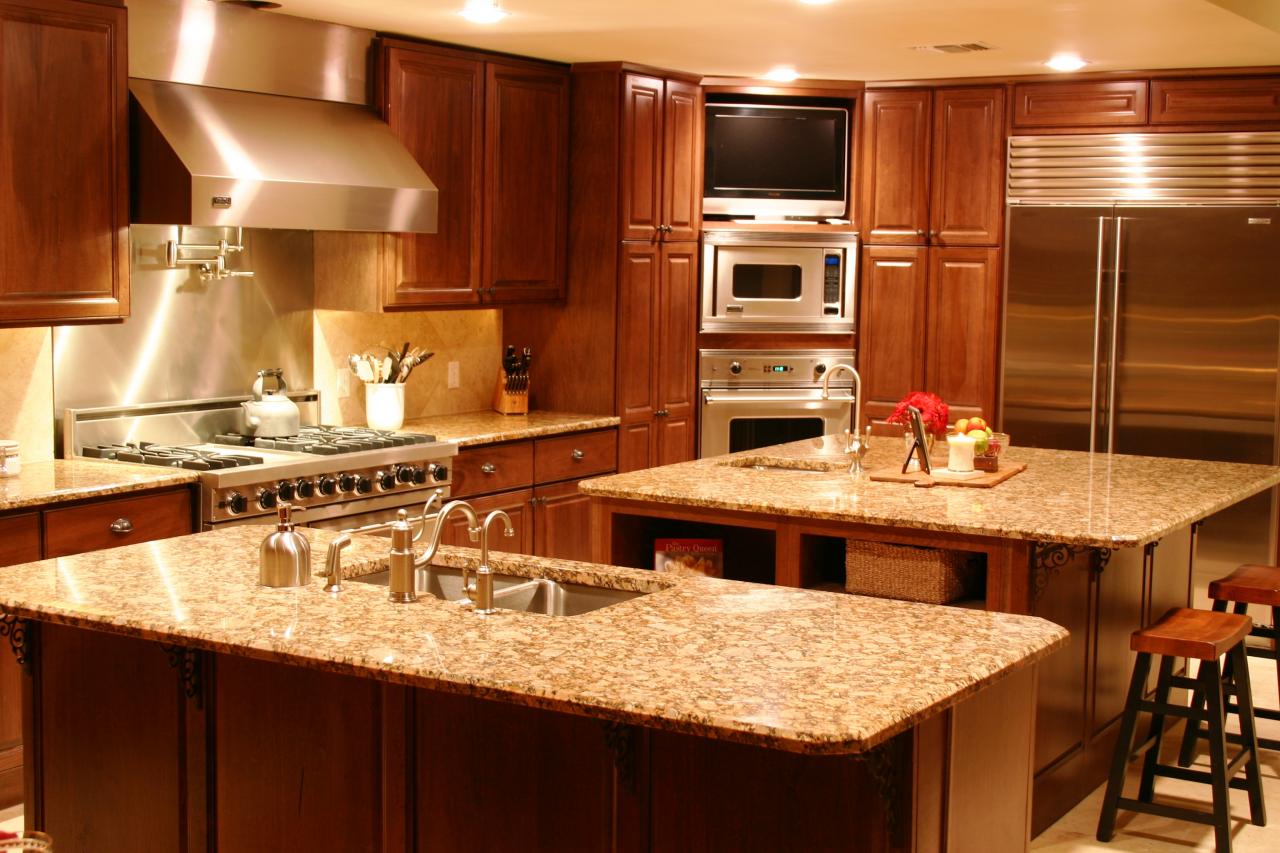
Overlooking your day-to-day lifestyle

Whether it’s the appliances or construction materials you choose, make sure every decision is made with your day-to-day lifestyle in mind. Will this choice fit with how you like to live each day? If it does affect your daily habits, will it be a positive change?


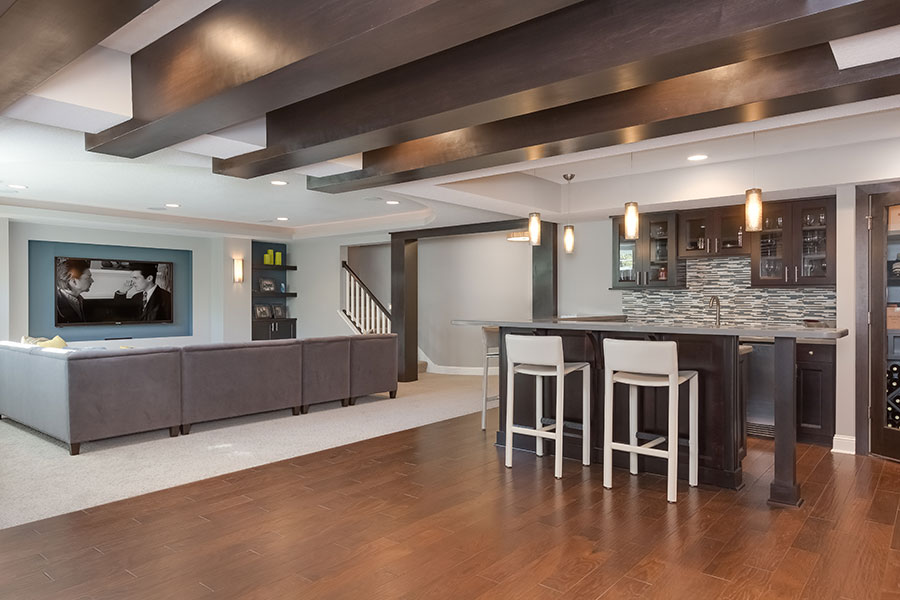
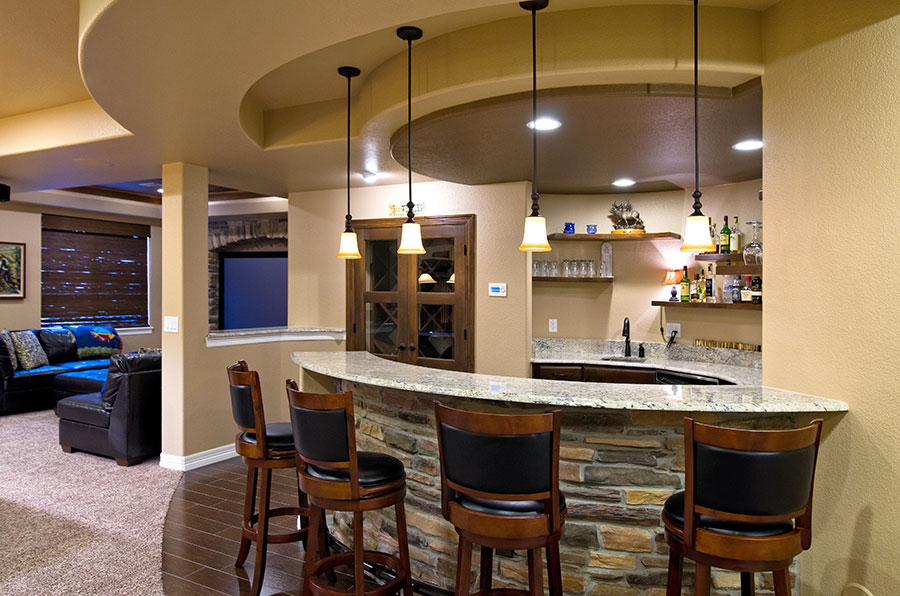
Sticking with the same layout

Dare to be creative! Renovation is so much more than just updating everything – you can completely transform the layout if you want! If something about the old layout bugged you all the time, just design the problems away. Many of the most impressive interior design layouts are often conceptualized through this problem-solving method.


Prioritizing style over function

Appearance isn’t everything and that’s especially crucial to remember during remodeling projects. Placing a greater emphasis on function means you’ll get a design that’s actually practical. When you’ve gotten the practicalities in order, you can then move on to making them beautiful.


Once you’ve taken the time to find a way around these traps, you’re well on your way to a successful house remodeling!

The Best Spring Renovation Projects for Your Home

admin


Just when it seems like winter will never end, it’s finally looking a bit like spring out there! With a change in season comes the task of deciding what renovation projects to tackle next for your home.


Here are the ones that make the best use of the weather warming up:


Backyard deck or patio

Although you technically can always wait till the start of summer to do this, the benefit of finishing it early in spring is that you’ll get a lot more use out of it when BBQ season rolls around. In any case, the ground is usually easy enough to dig into once the spring thaw starts happening.


Landscaping

Landscaping work goes on into the summer as well, but it begins right at spring. Again, the soil is soft enough by this time to work with. Preparations for spring landscaping means first cleaning up the yard from debris that had been buried in the snow all winter. Next, move on to planning out how you want the landscaping to look for the rest of the year. If a garden is part of the design, then you also have to start planting seeds.


Repair winter damages

The winter season can wreak havoc on your house if you don’t keep an eye on things. Most winter damage occurs from the expansion of ice crystals where water tends to accumulate. So as soon as spring arrives, re-seal all the doors and windows to fill in any air leaks. That will also help your air conditioners work efficiently in the summer.

On the outside, make sure the gutters are clean and that there aren’t any junk blocking the drainage path. On the inside, get a professional to check on the plumbing and fix damages.


Renovate bathroom

If the plumbing needs to be repaired anyway, it’s a bonus reason for bathroom renovations. And while you’re at it, don’t forget to put in bathroom features that will boost your home value. Doing your bathroom renovations in spring will also prepare your bathroom for heavier use during the hot summer season.


Refinish hardwood floors

Now that winter is on its way out, you won’t have to deal with dirty slush tracking all over the floors. By taking advantage of this time to refinish your hardwood floors, they will actually stand a better chance of looking nicer longer.


Let’s roll up our sleeves and prepare for the arrival of May flowers soon!

7 Tricks to Visually Enlarge Your Living Space

admin


No matter how much thought you put into your home renovation to create more space, there’s not much you can do if you’re constrained by a small house on a small lot.


But even though you may not be able to squeeze more space out of it, there are still some illusion tricks you can use to visually enlarge your living space:


Maximize storage space

If you already have a small house in the first place, then it’s all the more crucial to make every inch count. You’d be surprised at how a little creative remodel can pack a kitchen to the brim and turn a basement into storage haven.


Let in natural light

The more natural light you let in, the more open the room will feel.  Go for large windows and even put in a skylight or solar tube if you have to. Whatever you do, try to leave the windows uncovered or at least use solar shades or sheer curtains as the window treatments.


Bring attention to the ceiling

You can make the room seem taller by guiding people’s sightlines to the ceiling. Use vertical patterns on the wall like vertical shiplap or wainscoting. Another good trick is installing a floor-to-ceiling bookcase or, even simpler, mounting hanging shelves near the ceiling.


Neutral or light colour scheme

You’ll want to stay away from dark colour schemes as those are used for a more enclosed and intimate feel. Stick with neutral or light colour shades and the room will open up to a comfortable brightness for everyone.


Light it up with lamps or sconces

Ceiling lights will create the illusion of a lower ceiling, which further cramps the room. Instead, use sconce lights as ambience lighting while floor or table lamps can serve as the room’s functional lighting.


Get the right furniture

When choosing furniture for a small living space, opt for those that are multi-functional. This will save on space big time. Try to find furniture pieces with exposed raised legs as the visible space underneath them reinforces the open feeling of the room. Also, make sure the upholstery is done in light, solid colours. If you really want some patterns, go with those that are minimal and less busy.


Put up mirrors

This is a classic space-enlarging trick. It all depends on where you place them. Ideally, you’ll want them across from a window to bounce natural light around the room. They’re also great behind large furniture pieces to make them less imposing in the room.


Besides taking full advantage of these tricks, remember to keep a regular de-cluttering schedule! That in itself will go a long way in making your living space seem larger.

Here’s Your House Key to Energy Efficiency Success

admin


With every renovation project that you take up, take small steps to strive for net-zero energy housing standards. By always thinking about how you can make your house more energy-efficient, both the environment and your utility-bill savings will thank you.


Here’s how you can get started:


Heating and cooling efficiency

It’s crucial to first make sure that you stop all current and potential air leaks in your house. That means reinforcing or replacing weather strips around your windows and doors. It also means going further by covering air leaks around electrical sockets, pipe cut-outs, dryer vents, and even pot lights that stick out into the attic.

Next, you’ll want to find the best insulation options for your house and shore them up. You should also think about changing your furnace to an energy-efficient one. For greater efficiency, make sure that your HVAC system is connected to smart thermostats that you can program around your work schedule.

Don’t forget about radiant floor heating either! Often times, it’s your feet that feel the coldest so warming them up may be all that’s needed. Radiant floor heating does that with less energy use than turning up the thermostat.


Water conservation

Rather than going with a standard toilet, a low-flow or dual-flush toilet is one of the biggest water conversation investments you can make in the house. Continue the same theme with the installation of low-flow showerheads and aerators on all faucets. By watching water consumption in your house, you’ll also do your part in conserving the decreasing global fresh water supply.


Electricity savings

This last part addresses your day-to-day electricity use. With electricity being such an essential part of modern life, it pays to find ways to use it more efficiently. A major upgrade you can consider is adding renewable energy sources like solar panels to your home. They’ll help offset your electricity bills since you won’t have to draw as much from the city’s electrical grid. And if you end up producing more electricity than you use, you may even be able to sell the excess back to your electric company.

Modern life also comes with an ever-increasing number of electronic devices in the household. Even when they’re not in use though, they still draw standby power. Prevent this by plugging them into smart power bars. Another significant way you can save on electricity is to switch to LED lighting throughout your house.


Finally, before implementing any energy-efficient initiative, see if it’s eligible for Toronto’s Home Energy Loan Program (HELP)!

What to Watch Out For When Renovating Older Houses

admin


From mid-century houses to those built even earlier, they all have their charms. Maybe it’s the one-of-a-kind craftsmanship or architectural details that draw you. Or maybe it’s the beauty in its aged finishing materials.


Whatever moved your choice to settle in an older house, there are some specifics you should watch out for when you get down to renovating:


Damaged foundation

Time takes its toll on everything and it’s evident in a lot of older houses. With the foundation holding up everything for so long, there’s bound to be cracks you should be wary about. It also doesn’t help when mid-century house foundations were built with cinder blocks instead of sturdier cement ones. Depending on how damaged the foundation is, you’ll have to factor in the high costs of repairing it or most likely pouring a new foundation altogether.


Hazardous building materials

There’s a reason why building codes are always evolving. We often don’t realize until years down the road that the construction materials and methods we use are actually not as safe as we thought.

Older houses are full of questionable and even downright hazardous materials. Be on the lookout for lead-based paint as well as lead presence in plumbing pipes. And, of course, be extra careful with asbestos as it’s a common hazardous construction material used on houses in the old days. If traces of these hazardous materials are found, they should be removed by professionals only.


Corrosion-prone galvanized pipes

Besides getting rid of lead, you should also check if your plumbing is made from galvanized pipes. Galvanized pipes are no longer in use because they’re prone to corrosion and eventually clogging. If you have galvanized pipes for plumbing, you should think about replacing them with PVC or copper ones.


Unsafe electrical system

Our household electricity needs have increased massively since the last century. If old electrical boxes are not brought up to code to handle modern appliances and electronics, they’ll be safety hazards that run the risk of electrical fires starting. On top of upgrading the electrical box, make sure as well that all electrical outlets are grounded.


Single-pane windows

Windows are a major source of heat loss in a house and even more so if they’re single-pane windows often found in older houses. It’s always a good idea to invest in double-pane windows for better insulation and future heat cost-savings.


Odd floorplans

Tastes in living spaces change over the years so you may have to reconfigure room layouts to suit your needs. For example, houses back in the day tend to have smaller rooms. If you want larger rooms, you can knock down some non-load-bearing walls to combine small rooms together. Again, you should always leave that to a professional to handle for safety’s sake.

Keep in mind too that older houses mean a long history of multiple owners who had different standards for home improvements. As renovations are under way, you may find it necessary to fix or even completely overhaul some features so that everything is done properly. That can be an expensive exercise in and of itself.


The key to renovating older houses is finding that sweet balance between preserving the house’s character and remodeling with modern materials. And that can sometimes lead to treasure hunts for original construction materials at salvage stores! Whatever you do, ask your general contracting company for advice. By talking about what you’d like to preserve in the house, you have lots of opportunities to hash out some creative ideas together.

4 Steps to Budget for Your Next Home Renovation

admin


Committing to a home renovation is a big deal. While it’s much more exciting to dream about the new changes to your home, it’s important to make sure you have a solid budget for the project.


It’ll go a long way in ensuring a smooth renovation and there’s only four steps to it:


1) Know what you want

Take the time to write out exactly what you’d like to be done on the renovation. By sitting down to outline what’s most important to you, it’ll be clear where the focus should be. Should you start on the kitchen, bathroom or basement first? There are also advantages to renovating more than one room at the same time. How extensive will the renovations be? Is it a complete gut and remodel? Or do you only want to swap out the finishing?

After your wishlist is finalized, split it into two sections: “Top-Priority Features” and “Nice-to-Have Features”. This will come in handy later on if you have to cut back on what you want done.


2) Get a rough estimate of the costs for what you want

Talk to your friends and neighbours who have recently done renovations that are similar in scope. Ask how much it cost them. Then, based on your renovation to-do list, request a quote from your local general contracting company. In addition to labour and permits, don’t forget to discuss how material purchases will be handled as well. You may also want to compare quotes and references of other general contractors to get a better range of what’s out there.


3) Review your financial situation

Do you have enough in your savings to cover the estimated costs as well as an extra cushion for contingencies? If not, how much do you need to make up the difference? Once you know how much more you need, it’s time to decide whether you want to reach that figure through financing or saving up for it.

Financing, for instance, includes options like home equity line of credits (HELOCs) or loans from the bank. Before locking yourself into a new financing plan though, always make sure that your income level now and in the foreseeable future can handle repaying the debt plus interest. That means the loan repayments won’t impact your major house and food expenses, while still leaving room enough for contributions to your savings.

If you’re not comfortable with financing, then saving up is the best way to go. It may sound tedious, but you’ll actually get there a lot faster than you think with a good system in place. First, figure out how much you’re able to squirrel away every month after your non-negotiable expenses are taken out of your paychecks. Then divide how much you more you need for renovations by the monthly amount you’re able to save. That will give you the number of months you need to save up for the renovation.

With that goal set, you just have to make sure you stay diligent in your monthly savings. The most reliable way is arranging automatic monthly transfers to an account set aside for the renovation. Sometimes, that may also mean cutting back on some of your entertainment expenses. It’s worth it though in the end because you know you’re saving up for a good cause!


4) Keep a budget-tracking process in place

Pre-set reminders for yourself to regularly check up on how much of your budget is spent as the renovation progresses. You can make it as advanced as a spreadsheet tracking all the invoices as they come in. Or it can be as simple as touching base regularly with your contractor to get cost updates.

Tracking your budget for the whole project duration helps you minimize any surprises when the renovation is completed. It also lets you predict if the project will go over-budget. If that’s the case, that’s when you have to take a hard look at which nice-to-have features should be removed from the to-do list.


With the budget side of things now taken care of, keep the momentum going by preparing your house for the big remodel!

Guide to Bringing Holiday Cheer to Every Room in the House

admin


You may be part of the annual neighbourhood tradition of keeping the holiday spirits going with front lawn decorations. But what if you also want to do the same on the inside this year?


Fear not, we’ve got you covered – with ideas for every room in the house:


Basement

The decorations you choose for the basement depends on what kind of room you’ve turned your basement into.

Den or home theatre

LED strip lights running along the baseboards are a great feature for the den. They give the authentic theatre experience of guiding people to their seats. What’s even better is that you can customize the lighting colours you want at the flick of a switch. So come Christmas time, you can change the LED colours to patterns of red, green or white. If you’ve got framed posters of your favourite films on the walls, swap them out with framed posters of your favourite holiday movies. Finally, border the television screen with tinsel garlands. Or you can flank it with two Christmas trees decorated with everything but string lights. You don’t want any lights to distract you from the movie, after all. For a simpler décor, just mount a large festive wreath above the television screen.

Playroom

Whether the playroom is for the kids or the “kidults”, this is where you can throw in all the whimsical holiday decorations you want. Stick on cartoon wall decals of classic holiday characters. Create a giant, wall-sized advent calendar with fabric pockets for different days of the month. Hang colourful homemade stockings on the side of every basement stair step. And don’t forget to put up framed photos of your favourite past holiday party moments.


Bathroom

After converting the bathroom into your very own personal spa, you want the holiday decorations to be subtle and not too intrusive. Keeping with the spa theme, you can first get candles in holiday colours or designs and do the same with the towels. Next, hang up a framed painting of a winter landscape or a holiday theme.

If you want a little more, set a poinsettia flower arrangement on a back corner of the bathroom vanity. Not a fan of poinsettia? Fill a large glass jar with Christmas tree baubles instead. You can also arrange evergreen boughs around the edges of the vanity mirror.


Bedroom

For the bedroom, choose decorations that bring out as much of its cozy feeling as possible. For example, change the pillowcases, blankets or bedsheets into ones with holiday patterns or colours. Add to the coziness with a couple of thick oversized stockings hanging on the two lower bedposts. Next, border the ceiling with colourful string lights to create a sense of magic in the air just before you go to bed.

The finishing touch can be a mini Christmas tree on a corner of the dresser. Or as a cute gesture, arrange a mistletoe above you and your significant other’s bed.


Kitchen

With the kitchen being the centre of holiday feasts, decorations should be all about making the room appeal to the appetite. Bring the Christmas-themed cookie tins out onto the counter and fill them with baked goods throughout the holidays. Then, place a holiday-inspired centrepiece on the kitchen island. It could be something as simple as a fruit bowl with festive carvings or even a tiny Christmas tree with edible ornaments.

Still focusing on the kitchen island area, take inspiration from the shape of the light fixture above to decorate it for the holidays. If they’re pendant lights, you can use tinsel garlands to create Christmas tree outlines. If they’re built in a square or rectangle shape, transform that into Santa’s sleigh. Top off the kitchen decorations by changing the bar stool fabric upholstery to ones with holiday designs. Make sure that you’ve also got tea towels in place that have festive embroidering.


Living Room

As the main room that’s the hub of holiday festivities, decorate the living room in a way that you and guests will find warm and inviting. The big Christmas tree in the corner is probably a given, of course. Up next is the window display. It’s nice if you can make it fun to look at from the outside and the inside. Macy’s holiday window displays are famous in New York so it doesn’t hurt to take a page or two from their designs.

You’ll also want to change the throw pillows and quilts on the couch to ones with holiday-themed designs or colours. The best way is to get throw pillows with removable fabric covers. That way, you just have to store fabric covers for whatever occasion and switch them out as needed every year. Hook up a sound system in the room and pipe in a broad range of holiday music – from classic carols to pop songs. Just make sure to keep the volume level down to background level. Last but not least, decorate the fireplace with stockings and ornaments on the mantel. After that, stock up on firewood because nothing complements winter holidays best than getting a lively fire going.


From all of us here at Premier Group Contractors, we hope you make merry and enjoy your holidays!

How to Freshen Up the Kitchen Scent – Part 2

admin


On top of Part 1’s immediate and short-term cleaning in the kitchen, keep the long run in mind as well. Fighting lingering scents is much easier after you’ve scheduled cleaning for the major food stops in the kitchen.


Every three months

The range hood filter is your first line of defence to combat kitchen smells. Its efficiency decreases over time though and should be cleaned or changed after three months of use.

The larger the household, the more crucial it is to have a good fridge management system in place. Even so, certain foods can get missed and transform into the new offending smell in the kitchen. Spills happen in the fridge, too, that add to the unpleasantness. You can keep on top of that by cleaning the fridge every three months. Soak the drawers in warm soapy water and wipe down the fridge interior with a baking soda solution. Always keep an open box of baking soda inside the fridge to absorb additional smells.

This is also the time to clean other appliances, both large ones like the oven and countertop-sized like the microwave. For the oven, scrape off all the crusted food bits and sweep them out. Use warm soapy water to soak the oven racks. After scrubbing the stubborn stains in the oven with a mixture of baking soda and vinegar, turn on the oven’s self-cleaning function.


Extra fresh boost

Regardless of how religiously you follow this cleaning schedule, you sometimes need to give an extra fresh boost to the kitchen. It may be that you just stepped into the kitchen and still smell yesterday’s cooking extravaganza. Perhaps you have guests coming over or you’re showing the house to potential buyers today. Whatever the reason may be, there are a bunch of DIY tricks you can try. Remember that all these tricks depend on what the ideal kitchen fresh scent means to you.

Airing it out

The first thing you’ll want to do is point a running fan in the direction of an open window. This works very well in pushing the indoor kitchen air – along with all its scents – outside.

Breakfast food to the rescue

If you need a cup of coffee to start your day anyway, brewing a fresh pot is usually enough to get rid of yesterday’s cooking smells. Same thing if you like to have toast in the morning. Freshly brewed coffee and bread toasted dark brown are very effective air scrubbers. What’s great about these two ideas is that they can fit right into your morning routine.

Steam-powered air fresheners

Another way to clean the air is to simmer a few slices of lemon or oranges. The acidity of the citrus fruit will then spread through the air carried by steam. You can also try simmering your favourite herbs or spices if you’re not a fan of the citrus scent.

Good ol’ apple pie

A classic idea to make your kitchen smell welcoming is to heat up an apple pie in the oven. Real estate agents use this trick all the time for open houses because the scent brings up feelings of warm coziness. It’s especially potent if visitors grew up with never-ending baked goods in the house.

Scent swaps

You can also put scent replacements around the kitchen. This could mean vanilla-soaked cotton balls, bowls of water with drops of essential oils, or even mild scented candles.


You’ve already gone out of your way to avoid mistakes while renovating your kitchen – don’t let bad smells ruin all your hard work! Stay fresh.

How to Freshen Up the Kitchen Scent – Part 1

admin


You know that feeling: no matter how delicious last night’s meal was, the kitchen just doesn’t smell as nice in the morning. There are quick fixes you can try in Part 2, but the best way is to first develop good cleaning habits and schedules in the kitchen.


While cooking

Rather than waiting till the very end to get rid of the cooking smell, why not minimize it as it happens? Turn on the range hood while you’re cooking. It may mean a noisier cooking session, but there won’t be as much lingering smells to deal with afterward.

Remember to wipe up spills right away, too – it only takes a second. Letting them crust over will not only make cleanup harder later, but it’ll also contribute to bad smells the next day.


Immediately after cooking

Leave the range hood running. You can always turn it off on your next trip back to the kitchen. This will take care of as much residual smells as possible.

Also, rinse away the food bits and sauces from your cooking utensils as soon as you’re done with them. Don’t forget about the cutting board! It doesn’t take long for it to absorb strong ingredient smells like garlic and onions. Use a cutting board scraper to clear off chopped ingredients and juices from its surface. Give it a quick rinse and dry it afterward. Proactive rinsing lessens the risk of smells clinging on to your cookware.


After meals

If you make a habit of washing dishes after every meal, you’ll eliminate most of the scents that come with the mess. Whether it’s by hand or by loading up the dishwasher, do it regularly every day. The moment they’re dried and put away is when that new kitchen feeling comes back in all its uncluttered glory.

A meal with lots of fried dishes or strong spices calls for a bowl of baking soda or vinegar to be set out for the night. They’ll absorb the cooking scents overnight so that you can step into a fresh-smelling kitchen the next morning.


Every few days

Another culprit of funky smells is often the kitchen trash can. Make sure to rinse the inside of the can with hot water every time you throw out the garbage. Give the can a more thorough cleaning with detergent once every few days, too.


Weekly

Grease accumulates very quickly on kitchen surfaces so it’s good to wash them every week. Focus on the exterior of the stove, range hoods, kitchen cabinets, and countertops.

Both the garburator and the sink drain needs to be cleaned weekly as well. For the garburator, make sure to scrub the two sides of the top rubber flap. Afterward, drop in a few ice cubes and lemon peels. You can also pre-freeze cubes of lemon peels in vinegar to pack an extra cleaning punch. When you turn on the garburator, all these ingredients will help clean the blades and keep them sharp. For the sink drain, sprinkle a generous amount of baking soda and then pour in vinegar or lemon juice. This will neutralize some of the gunk that builds up inside the drainpipes.


Monthly

When the dishwasher does all the heavy-duty cleaning work, it needs its own cleaning as well every month. Follow the instruction manual on how to remove and clean the dishwasher filter. Then run the cleaning cycle on the machine. If the manual doesn’t discourage it, you can also add vinegar to the dispenser during the cleaning cycle. Sprinkle baking soda inside the machine and leave it overnight for good measure. In the morning, run an empty cycle to rinse the baking soda away.


In Part 2, we’ll look at longer-term cleaning tasks as well as what you can do if you need to get rid of a smelly kitchen right away.

Can Kitchen Colour Choices Affect Your Appetite?

admin


“I can’t cook in this kitchen!” That’s a classic reason we often hear from customers on why they want to renovate their kitchen.


The best part about kitchen renovations is designing the colour scheme. And that’s more important than we may realize. There have been many studies done on how colour affects people’s perception of food. This particular one published in BioMed Central on how plate colour influences restaurant food is especially enlightening.


There definitely are certain colours that suppress appetite and others that stimulate appetite. So how can you bring that to play in the kitchen? And what if you’re also interested in using colour psychology to help in dieting?


A healthy balance to strike is to go with appetizing colours on the kitchen surroundings and unappetizing colours on the dinner table. You want the kitchen itself to inspire you to cook delicious and healthy food. The dinner table is where you want to control the risk of overserving yourself.


Colours that suppress appetite

Let’s get the unappetizing colours out of the way first. Some of these descriptions may be a little too descriptive, but it helps to understand the psychology behind why these colours are appetite suppressants.

You can use any combination of these colours at the dinner table to discourage yourself from overeating. Choose these colours when you’re buying dishware, eating utensils, napkins, and tablecloths. Having said that, it doesn’t mean you should pick the most disgusting shade possible. You can select these colours as the starting base and let your inner designer put them together stylishly:

Black

Black turns off the appetite because it’s associated with toxins, poison, and burnt food. Coincidentally, it’s also a slimming colour in fashion. That makes it a good reminder to have at the table if you’re on a diet.

Blue

Except for blueberries, you don’t see blue very often in the food world. So, right away, that colour is a turn-off for your brain.

There’s also a positive reason though why blue isn’t appetizing. Blue has always been a calming colour due to its associations with peace and stability. It probably has a lot to do with the blue sky as a constant in everyone’s lives. The colour is so soothing that your entire body – including your appetite – can actually slow down to the point of lethargy.

Brown

When you link brown with food, you usually think of waste and decay. Or overcooked food. All of which doesn’t sound delicious at all.

Grey

Grey brings to mind a dry and bitter taste – kind of like ashes. Mmm-mm.

Pink

With perhaps the exception of medium steak, pink is an unnatural food colour. It’s reminiscent of raw meat. And thousands of years of cooking in our DNA have taught us to avoid that.

Purple

Other than eggplant, this is another uncommon food colour and therefore less trustworthy.


Colours that stimulate appetite

Time to regain your appetite! Mix and match these colours for your kitchen walls, cabinets, countertop, and even cookware. These colours will inspire you to cook more gourmet but healthy meals:

Green

Green is a colour of health and abundance in nature. Besides our parents repeating the benefits of eating greens, our healthy view of the colour is probably also a throwback to our primitive days of being mostly herbivores.

Orange

Orange is always welcoming because of the warmth and comfort associated with it. It’s also an autumn colour, when the last harvests of the year are reaped before the cold sets in.

Red

Red is the undoubted colour of passion and energy. Just the mere sight of it is enough to make your heart beat faster, which primes the rest of your body functions like appetite for action.

Turquoise

Turquoise whets your appetite mainly because of the imagery it evokes. It gives you that tropical feeling of crystal-clear waves smoothing over a sun-kissed beach. Then you start thinking about tropical drinks, tropical food, and what Caribbean recipes to try.

White

White is an odd one on this list because it’s attached to the taste of blandness. It leaves you feeling dissatisfied and wanting more of something else. While it doesn’t open up your appetite per se, it’s a good base to pair with other appetizing colours so that you’ll want more of those. Just don’t use white dishes to serve food.

Yellow

You can trust the colour of the sun to make you happy. Yellow is also a colour of optimism. And when you’re in a good mood, your appetite is naturally stimulated.


Here’s to happy cooking and healthy eating!

1 2

WE LOOK FORWARD TO HEARING FROM YOU

Ready to take it a step further? Let’s start talking about your project or idea and find out how we can help you.

Close

REquest A Free Quote

Curabitur blandit tempus porttitor.
Sed posuere consectetur est at lobortis.


error: Content is protected!
Call Now Button