Today’s Top 4 Bathroom Renovation Trends

admin

After kitchens, bathrooms are the most commonly renovated rooms in the modern household.  Taking a cue from trendy restaurant and bar restrooms, household bathrooms have gained the potential to become Instagrammable spaces rather than solely functional rooms. Here’s a list of today’s top 4 bathroom renovation trends to help you create an area worthy of showing off to the world.   

Bathroom Fixtures


The first thing the eye is drawn to in any bathroom are the fixtures:  shower, tub, sink and toilet.  With today’s deluxe fixtures which can include walk-in showers, double sinks, free standing tubs and high tech toilets, the modern homeowner has a large variety from which to choose.  Select a fixture that can become the focal point of the bathroom and add the rest to accentuate.  Whether pursuing an ultra-modern or rustic sensibility, choosing the right fixtures will go a long way to setting the tone of the room.     


Technology


With smart technology becoming more common in everyday places such as the car, living room and kitchen, why not bring your bathroom into the 21rst century?  Toilets are available with heated seats, nightlights and self-cleaning technologies.  Showers and tubs can be fitted with waterproof music and television systems.  Sinks have touchless technology helping prevent the spread of germs.  In addition, water conservation innovations are geared towards saving money and the environment.


Tiling


Bathroom tiles that have recent gained popularity include raw and natural materials such as concrete or marble. Both lend a classic look while being thoroughly modern.  Continuing with the natural and raw trend are tiles that simulate the look of brick or wood.  At the time of tile installation, underfloor heating is also a popular choice to make the morning ablutions a little more appealing.


Modernist Comfort


A modern twist on old style comfort is leading the way in current bathroom renovations.  Plenty of natural light coming from large windows complemented with natural or faux natural tiling materials will accent sleek, minimalist new fixtures.  The addition of the newest innovations in water conservation, entertainment systems and touchless technologies bring the bathroom into the 21rst century.  By joining high tech innovations with old school coziness, today’s bathrooms have become a focal point in the modern household.

Simple Decorating Tips To Make Your Home Office Look Modern And Stylish

admin

In this day and age more and more people are working “remotely” or out of their own homes.  With this change in location comes the added task of setting up a home office.  Here are some simple decorating tips that can make your home office look modern and stylish.

The Desk

One of the most important parts of any office is the main work area – typically a desk.  Taking into account the space available to you, try and get the largest desk possible.  Not only will it allow you ample space to do your work, it will make it easier to keep things organized and looking tidy.

The Chair

Along with the desk, a good chair is just as important.  You will, after all, be spending most of your office time sitting in it.  Choosing a rolling or stable chair depends upon your preference, but do not skimp when it comes to a comfortable place to set your derriere.

Lighting

Although your office area likely has overhead lighting already, investing in some quality lamps can really change the look of your office space.  Lamps will add style and ambience as well as give you appropriate light for different tasks.

Flooring

Adding carpet or rug to an office will not only give you a warmer and more comfortable space for your feet, it can add to the overall decor of the office.  You may also want to add a plastic chair mat to allow easy movement of your chair without ruining your carpet, rug or floor.

Storage

Rather than keep stacks of papers, books and office supplies on your desk, take note of the organizational habit known as “mise en place” –  French for “everything in its place.”  Depending on your type of work, bookshelves, filing cabinets and various receptacles will keep your working space neat and organized.

Accessories

Accessories will bring out the personality of your office, so choose them according to the type of work you do and the style you want to project.  Whether it’s a matching desk set, works of art, or coordinated furnishings such as curtains or cabinets, tailor your acquisitions to the type of work you do.

Setting up a modern and stylish home office means thinking about a handful of key pieces.  Keep these in mind when imagining your office as a whole.  Tying these key pieces together will result in an office that you will be happy to spend time in.

How to Turn Your Basement into an Inviting In-Law Suite – Part 2

admin

Part 1 was all about peace of mind in maximising accessibility and minimising risks in the in-law suite. Now we make it comfortable and inviting:


Privacy and independence

This part is actually just as important because you don’t want the suite to seem clinical nor do you want it to be merely an extension of your house. Your parents or in-laws would definitely appreciate your efforts to provide them their own space to maintain their lifestyle. That way, they won’t feel like they’re burdening the family, which no parent or in-law ever wants to do.

One way to give them privacy is to soundproof the suite. You can shore up the insulation, which will also help maintain a steady room temperature. You can also use dual layers of dry wall or even special soundproofing mats behind the walls, doors, and ceiling. Solid soundproofing will allow both households to carry on their day-to-day lives without disturbing each other.

Even if the suite is small, try to set aside a sitting area with armchairs and a couch. This will give them a place to read and watch television. Above all, they’ll have an area to entertain guests while keeping up with their social lives.

Providing them with a spacious walk-in closet is a great way to increase their storage space. After all, they’re now packing their entire life into one suite and a large walk-in closet would help a lot in de-cluttering their living space.

For convenience, make sure that cabinets, shelves, and drawers are no higher than shoulder-height. This is so that they don’t have to reach too far up and risk injuring themselves. Also, give them independent control of light switches, heat, and air conditioning. It’s another way they can adjust the environment to their liking on their own.


Kitchen

Check first with municipal authorities to see if you’re allowed to have a full kitchen in the in-law suite. A full kitchen – including a stove, fridge, and sink – would give the greatest independence to your parents or in-laws. If it’s not possible to install a full kitchen, then include these at the very least: fridge, sink, microwave, and a portable double-burner cooking plate. Remember to also set up a table and chairs for taking meals there.


Bathroom

For the bathroom, make sure that the shower stall doesn’t have a curb that’ll present a tripping hazard. It’s also a good idea to include a stable, waterproof seat inside the stall so that your parents or in-laws have the option of sitting down during showers. Install a showerhead that has both an overhead fixture and a hand-held extension. The hand-held extension is great for when they’re sitting down for their showers. It’s a nice luxury touch, too, if the showerhead has a spa-like body-spray function. Handrails – with reinforced wall backing support – in the shower stall and around the toilet are essential for safety. However, they don’t have to be the cold, stainless steel hospital-style types either. To make the bathroom feel more stylish and warm, choose handrails with designs and materials that match the rest of the bathroom hardware. The handrails will then serve not only a functional safety purpose, but also as a decorative feature.


It can be challenging having your parents or in-laws move back in with you. But as long as respect is at the core of every interaction, solutions can be found for everything and everyone will appreciate one another’s company. Take the time to ask them what they need and really listen to them. By all means, voice your own needs as well. What’s most important is always keeping a dialogue going so that nothing ever gets lost in assumption.

How to Turn Your Basement into an Inviting In-Law Suite – Part 1

admin

Life is circular and it’s natural when the time comes for us to take care of our parents, just as they had taken care of us when we were little. This is also the time when our parents want nothing more than to be closer to their children and grandchildren. Having your parents or in-laws move in with you merges both needs together into one convenient location.
The best way to do this is by creating an in-law suite. If you already have basement space available, work with your contractor to prepare it for remodelling. Part 1 of this two-part series will give you some ideas on how to convert your basement into an inviting in-law suite:


Accessibility

It’s always a good idea planning ahead to help your parents or in-laws get around easier in the suite as they get older. This is not to say you’re expecting their health to decline; it just doesn’t hurt to have everything in place and hope for the best. Things like wider, 36-inch doorways are easy to install if you do it right from the start. If the suite has its own entrance from the outside, make sure it’s accessible via a ramp or at least a paved gentle slope. For the closet inside the suite, locate it directly under another closet upstairs in case you ever have to install an elevator one day.


Health and safety

Although you’d like to do your best to keep your parents or in-laws safe, don’t go so overboard that you might as well wrap the whole suite up in bubble wrap. That wouldn’t be inviting at all. Instead, think of it simply as managing risk. You can’t foresee every potential harm so just focus on minimising risk in the general environment.

First of all, let in as much natural light as possible so that the suite doesn’t feel like a basement. That means putting in large windows, which is mandated by law anyway if the suite doesn’t have its own exit outside. In addition, you can install a sun tube that’ll focus sunlight from the roof all the way down to the basement suite.

The basement is always prone to humidity even with all the proper vapor barriers in place. High humidity often increases the chances of getting sick. For that reason, an automatic dehumidifier should be set up to maintain the humidity at a preferred level.

The flooring should deal well with basement humidity. Above all, to minimise the risk of injury from falls, it should have a non-slip surface that’s not made of a hard material. That pretty much narrows it down to vinyl for the bathroom and kitchen as well as cork for the bedroom and sitting area. Cork is technically not water-resistant, but it’s a good compromise for safety since it’s got a springy surface (unless they don’t mind having vinyl laid down for the whole suite). Just make sure to clean up any spills right away.

Whenever you can, opt for rounded corner and edge finishes of the suite’s countertops and furniture.

Consider also installing an intercom or emergency call system so that your parents or in-laws can easily reach you on your side of the house if there’s an emergency.


Now that you’ve taken care of the crucial safety and accessibility issues, stay tuned for Part 2 where you can make the suite feel like home for your parents or in-laws.

4 Reasons to Renovate Your Bathroom

admin

With the amount of time we spend in the bathroom every day, the bathroom should be at the top of the renovations priority list (well, second to the kitchen). But if you’re ever stuck wondering exactly why you should renovate the bathroom before adding the patio in the back, here are four good reasons why:


Increased home value

If you’re thinking of selling the house in the near feature, this reason alone would be enough to spur you into action. The two rooms you’ll get the most bang for your buck in renovations are the kitchen and the bathroom. We’ve talked about why kitchen renovations are worth it before so we’ll focus on the bathroom this time. According to the “2016 Cost vs. Value Report” in Remodeling Magazine, U.S. homeowners were able to recoup as much as 70% of their bathroom remodel costs from their house sale. This high recoup percentage goes to show just how much buyers value updated bathrooms. It’s easy to understand why if you put yourself in the shoes of the buyer.

Think back to the times when you visited your friend’s house and had to use their bathroom at one point in the evening. It always feels a bit uncomfortable using someone else’s bathroom. Even if it’s spotless, there’s always that lingering doubt simply because it’s not your own. Now imagine if, on top of that, the bathroom looks like a “modern” bathroom from the heyday of the ‘70s. Yeah…you probably want to just quickly do your thing and get out of there as fast as you can. A newly remodelled bathroom goes a long way in helping potential buyers overcome their initial discomfort at being in someone else’s bathroom. At the same time, it’ll bring your house that much closer to many buyers’ dream of getting a turnkey house where they don’t have to deal with more renovations.


Utilities savings

New products with improved smart home technology come out every year and many of them are designed for to help homeowners save on utility costs. The bathroom is arguably where you use the most water in the house so it makes sense to upgrade its plumbing fixtures. Some water-efficient upgrades you can make include low-flow shower heads, low-flow faucets or faucet aerators, and low-flow/dual-flush toilets. There’s also the opportunity of installing energy-efficient lights as well. Instead of having a single ceiling pot light with inefficient bulbs, why not put in several lighting sources with high-efficiency bulbs? You’ll get multi-directional lighting – which is crucial in the bathroom – at a much lower cost.

These energy-efficient changes are big selling points for buyers because it means that they’ll maximise cost-savings right from the get-go. And if you don’t intend on selling the house yet, you’ll still get the pay-off of cost-savings in the long run.


Decreased clutter

We all know that entropy is king in our lives and it seems like there’s never enough space for all the stuff we accumulate. The same goes for life in the bathroom. Everyone has their daily bathroom routines and all the supplies for those routines get stored in the bathroom. Eventually though, the excess starts spilling over onto the bathroom counter. That’s when you know you have a problem. So when you get the chance to renovate your bathroom, make sure to maximise the storage space in there. You can build custom cabinets, open shelves, or even a storage closet if you have the space. It’ll give a good impression to potential buyers and you’ll feel like life is somewhat under control – at least when you enter the bathroom anyway! Ultimately, decreased clutter is what will lead you to the next benefit of renovating your bathroom.


Relaxation zone

When you’re in the bathroom with the door closed, you’re in your own zone. You can relax and have a moment to lose yourself in your own thoughts. To take full advantage of these moments, it helps a lot if you’ve treated yourself by turning the bathroom into your own personal spa. Switch out your shower head for a rain shower one with a body spray function. Install radiant floor heating and even towel warmers. In fact, just go all out and build a bathtub-shower wet room. Your future self soaking in a candlelit bubble bath will thank you one day.


The bathroom is where you prepare for and wind down each day of your life. So why not bookend every day with a bathroom that brings you joy?

Unlocking the Front Door Materials

admin

We tend to focus a lot on sprucing up the interior. It’s natural because we spend most of our time at home indoors anyway. Once we’ve got every room remodeled the way we like it though, it’s time to turn our attention to the house exterior.


The front door is great place to start so that you can upgrade the entrance security of your home as well as let your individuality shine through. Here are the three classic and dependable materials that people often swear by for their front doors:


Wood

Wood doors are divided into two different groups: solid core wood and solid wood. Some solid core wood doors have an insulating polyurethane core clad with hardwood and plywood. The whole frame is then finished with laminate or thinner pieces of plywood. Other styles use engineered wood as the core with a furniture-grade wood veneer on top. The main problem is that they don’t last for long when exposed to the elements as both heat and moisture can cause the plywood and laminate layers to warp. Damages to the surface are hard to fix, too, because you can’t refinish laminate layers. Even if the door uses a plywood finish, they’re often so thin that you can only sand and refinish them so many times. These are run-of-the-mill doors that are designed to be affordable. So if you’re just looking for a basic front door, solid core wood doors will give you that.

On the other end of the spectrum are solid wood doors. Solid wood is the most expensive of all the front door materials. Although it’s still at the mercy of the elements, it’s usually sourced from higher-quality wood that can withstand weathering much longer. Whenever solid wood doors does start to look weathered, you can always sand and refinish them to give another boost of life. With their natural heavy strength, rest assured that solid wood doors will keep your entrance secure. Plus, you’re guaranteed to have a door that’s unique with one-of-a-kind grain patterns.


Steel

When you think of steel doors, you associate them with high-security. And that’s true, to a point. The quality really depends on the gauge of the steel though: the lower the gauge number, the thicker and higher-quality the steel. If you want a solid door, try to get at least a 22-gauge steel door for a sturdy build that doesn’t flex like big-box-store 24-gauge doors. When steel flexes, it chips off the protective paint layer and exposes itself to rust. Another reason to invest in a higher-quality steel is that it minimises dents from blunt forces. Minor dents in steel doors can be pulled out with auto-body repair kits. Larger dents that can’t be repaired that way means you end up having to replace the whole door. The cost of steel doors again depends on the gauge, but they generally cost less than solid wood doors. Something else to keep in mind about steel doors is that they’re not the best at insulation. Although most steel doors have a good insulation core, you can’t change the fact that the metal itself conducts heat. But if you live in a moderate climate and top security is your only concern, then steel doors are a formidable choice.


Fibreglass

Fibreglass doors are the ones you can rely on in harsh climates. Because they don’t warp from moisture and don’t conduct heat, they last a lot longer and are better at insulation. They’re also a great alternative to mimic the look of wood at a much lower price. There are special coating techniques that layer the finishing with similar patterns and depth as natural wood grains. The trade-off with fibreglass doors though is they’re not as secure as the heavy-duty steel or solid wood doors. Fibreglass doors crack easily under heavy impact. If you live in a safe neighbourhood where security’s not an issue and you want an affordable door that can weather the elements for a long time, fibreglass doors are the way to go.


In the end, choose the material that’s best suited for your climate and lifestyle. Then, find ways to put your own personal stamp on it like custom hardware or personality-matching paint so that you can stand out from the crowd.

Making Your Home Kid-Friendly

admin

What’s the ideal environment to raise your children? That’s the golden question for a lot of parents and you’ve probably asked yourself that countless of times. Some swear by giving kids the freedom to play and make their own discoveries. Others prefer a more structured life at home. There’s really no right answer because everyone’s different. All you can do is listen to find out what your children’s needs are so that you can keep adjusting their environment to nurture them the best you can.
One of the adjustments you can always make is to your home. That’s also a tough balance to maintain. Think about what everyone’s daily habits/responsibilities are in your home and what can be changed to ease them. Ideally, the home improvements help make life easier for your kids as they’re growing up while also staying versatile enough to fit with their young adult lives years later. Here are some ideas:


Prepare for wear and tear

Kids are always going to make a mess. They’ve just started learning how to put one foot in front of the other. And it’s not as if grownups are any better because some of us still end up being klutzes after all these years! You don’t have to freak out every time they start wandering around. Just choose materials throughout the house that are sturdy, easy to clean, and can handle anything kids throw at them.

Let’s start with the floors, which get the most use in the house. Lay down carpet or cork for the kids’ bedrooms and play areas (but not if their play areas are down in the basement). In the kitchen where spills are most likely, go with stone/ceramic tile, vinyl, bamboo or cork. Make sure the flooring you choose have non-slip or textured surfaces. Every room is more suited to specific flooring types so keep that in mind, too. If you want to have rugs, consider using outdoor rugs on the inside. They’re usually made of tougher material that can take a lot of damage without being too noticeable.

Invest in some durable countertops that don’t stain and are low-maintenance. Laminate is always a popular choice because it’s inexpensive and won’t be too heartbreaking to replace further down the road. If you want a more durable and longer-lasting choice though, quartz countertops are the way to go. Yes, they’re expensive, but there’s less chance of having to replace them due to damage.


Family central

Kids grow up so quickly and you want to be there to catch every moment. That’s why it’s best to go with open floor plans that allow your kitchen, living room, and dining room to flow into one another. These are the central areas where most of the family hang out during the day. Opening them all up will give you more opportunities to interact with your kids. Plus, you’ll have better sight lines to keep an eye on them!

If you have space, it’s a great idea to install a kitchen island with a sink, food preparation area, and breakfast bar counter. That way, you can chat with your kids while you’re doing dishes and they’re enjoying their afternoon snack. You can turn the kitchen island into even more of a central activity hub by building in a family schedule bulletin/white board at one end, hidden out of sight with a cabinet door.

In the dining room, try using slipcovers to protect the chairs from mess. You can get different sets of slipcovers and switch them out for cleaning or special occasions.


From accessibility to DIY

It’s only a matter of time until your kids naturally get curious about what’s inside all the drawers and cabinets in the magical land of the kitchen. Encourage their curiosity without any worries by stocking the lower drawers with contents you’re okay with them handling. This can include dishes, too! It may seem like a bad idea at first, but if dishes are stored in lower pull-out drawers, they’ll have an easier time reaching them. It’s especially useful if you put the dish drawer(s) right next to the dishwasher so you can encourage them to start doing things themselves while helping you put dishes away.

Continuing on the DIY encouragement path, place snacks and food that your kids are allowed to eat in the lower pantry shelves. Anything you don’t want them to touch can go on the higher shelves. Do the same with your refrigerator. If you have a large refrigerator with many drawers, designate specific drawers to hold fresh food for each of your children’s tastes. By making healthy snack ingredients accessible for your kids, you set them on a good path to start learning how to take care of themselves. It’ll make your life easier, too, while you’re at it.


Clear the traffic jam

Getting your kids ready for school while getting yourself ready for work is always a struggle. Over the years, you’ve probably refined an efficient routine to get the morning chaos under control. To streamline everything even more, clear up the waiting times for everyone’s turn at the bathroom. Either add a second bathroom or install a double-sink vanity in the current bathroom if possible. Also, put in a storage closet/cabinet to better organise everyone’s toiletries and reduce the frantic hunts for something someone else misplaced.


Above all, try to remember what it felt like when you were growing up. It’ll help you see the world through your children’s eyes. And remind you how awesome kids are.

10 Kitchen Renovation Mistakes to Avoid

admin

There’s no better place to start renovations than your kitchen. Once you’ve decided to take the plunge to renovate though, it’s hard not to scream, “Cannonball!” and dive right in. Though that sort of enthusiasm is the spice of life, it pays off to think about the best way to reach the shore on the other end before your running jump.

Above all, avoid these 10 kitchen renovation mistakes:


Not buying appliances first

What a headache it is to find out at the very end that your appliances don’t fit between your countertops and cabinets! That’s a very expensive mistake to fix. At best, you only have to re-adjust one set of cabinets; at worst and most often, the domino effect of fixes forces you to re-do everything. You don’t want to have to go through that. So buy your appliances first. In fact, have them on-site to get regular and accurate measurements during renovations.


Not designing for kitchen workflow

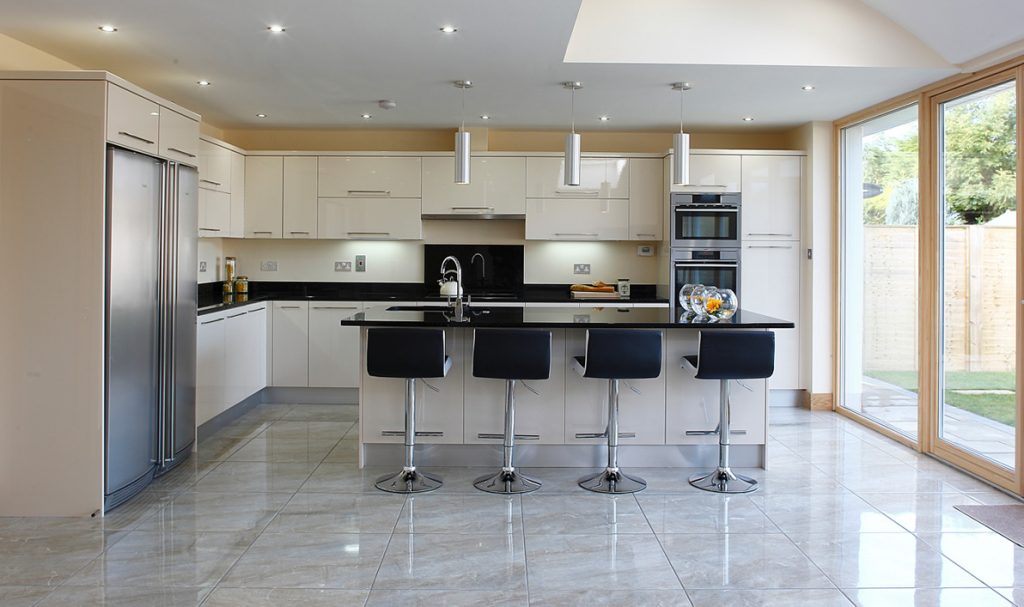
Besides looking great, renovating your kitchen to makes it easier to work in. You want your workflow from refrigerator to countertop prep space to stove/oven to sink as efficient as possible while you’re cooking the meal that wows your family and friends. Think about your signature dishes and how you usually prepare them. Then figure out the best placement of appliances and kitchen elements to minimise the travel time between them all. One way is to place the element where you spend the most cooking time on in the middle and spread the other appliances/elements at equal distances around that central element.


Not protecting surrounding areas

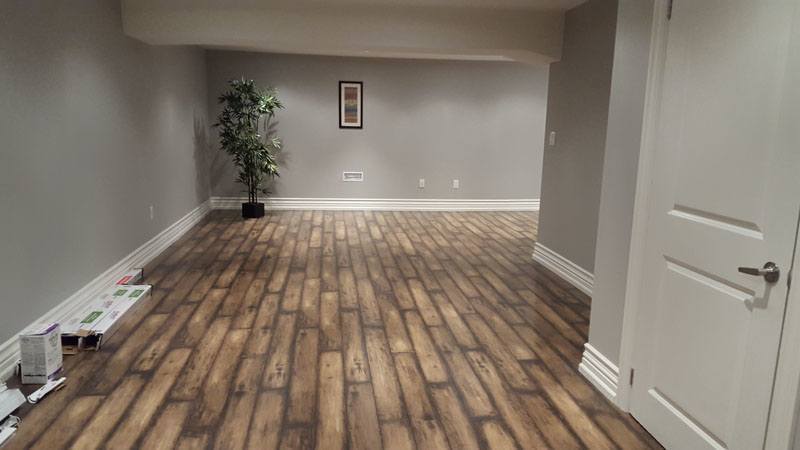
You can’t avoid messes with renovations. So prepare for that reality by covering up appliances, furniture, walls, and floors in the hallway or room(s) that open into the kitchen. Plastic sheets, tarps, or large pieces of cloth work well as protective covers. For bonus points, you can even cover up the high traffic route from the entrance to the kitchen. This may be a lot of prep work, but it’ll make things that much easier to clean up post-renovation.


Not maximising kitchen storage space

With creativity, you can pack in a lot of storage space in the kitchen. By maximising storage at the start of your renovation plans, you’ll save money further down the road. Adding storage after the fact is much more expensive and won’t make full use of the space as efficiently.


Not increasing countertop space

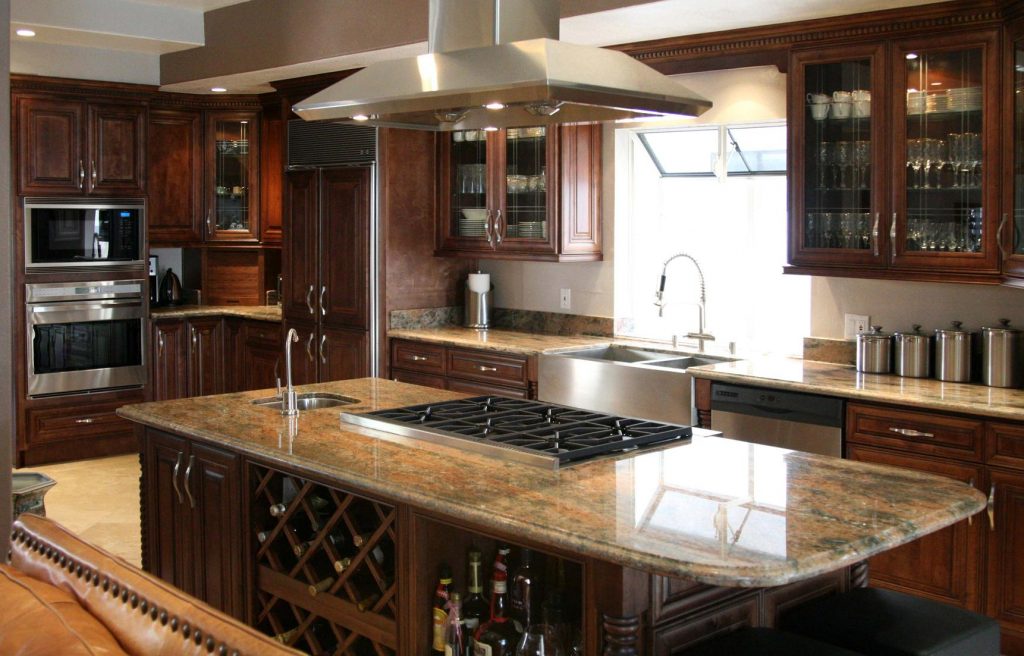
Countertop space is always at a premium in the kitchen. So don’t let the size of the island or bottom cabinets stop you from extending your counters further out. First, make sure you’ve enough space in your kitchen and it won’t block traffic. You can then reinforce the extensions with proper supports and bracing, finished with the same look as your cabinets. Always check with professionals though to make sure the reinforcements are strong enough.


Not considering practical details

Is your kitchen bright enough to work in? Adequate lighting over your cooking areas is a must. You can also augment the working lights with some accent lighting to soften the brightness of the kitchen if you find it too harsh. Is there proper ventilation? Aromas are great while you’re cooking, but not so much after the meal is long done. Get rid of cooking smells with a range hood or, at the very least, a ceiling fan. Are there enough electrical sockets? If you depend on a lot of electric kitchen gadgets while cooking, install a bunch of sockets in several locations throughout the kitchen. They don’t even have to stand out in plain view because there are many hideaway designs of sockets built right into the kitchen counter or island. Where will the garbage and/or recycling bin go? Design a custom pull-out drawer for the bins so they don’t end up in the middle of the kitchen floor.


Not projecting the inter-effect of design features

Even if you’re excited about a certain feature, think about where it’ll go and whether it’ll be in the way of something else. Apply the same thought process to colour schemes and material choices, too. The last thing you want is to crush your open drawer with the oven door while the cutlery fall point first to mark up your laminate floor.


Not getting help from professionals

Even the most experienced DIY-er can miss details that a professional can spot right away and fix before they become bigger issues. It’s always a gamble going solo on renovation projects. Plus, you won’t get to enjoy the many advantages of working with professionals.


Not reviewing and/or reinforcing your budget

Of course you want to include everything on your wishlist. But if something doesn’t fit your budget, it needs to go. Review your budget throughout the renovation and put your foot down before it starts ballooning out of control. The best way to stay within budget and still get your essentials is to honestly divide your design features into two lists. The first is the top priority list. The second is the nice-to-have list you’ll sacrifice when the top priority items turn out to be more expensive than you planned.


Not focusing on the benefits

Finally, keep reminding yourself why you’re renovating your kitchen! It’s easy to forget the reasons and benefits when you’re so caught up in the renovation chaos. The constant reminders will go a long way in helping you and your family let go of frustrations and focus on how it’s all going to be worth it in the end.

4 Insulation Options for Your House

admin

There’s nothing like coming back to a warm, cozy home at the end of a long day. You can finally change into your PJs, put on your fuzzy slippers, turn up the thermostat, and curl up on the couch with a nest of blankets and pillows. You may sometimes feel though that all the fuzziest slippers in the world and all the heat you can blast do nothing to keep away the shivers. That’s when you realise your house is poorly insulated (or that you may have a cold, in which case you may want to hibernate for a bit with some medicine).


It pays off to get a professional to evaluate the energy efficiency of your home – especially to figure out where to shore up insulation. Poor insulation leads to heat loss and money drain on your utility bills. Of course, it’d be nice if insulation were already built into the original plans of your house when you bought it – and there are ways to do that with new builds.


To fix the insulation inefficiency in your existing house though, here are some options you can choose from:


Blanket

Packaged in batts or rolls, this the simplest and most common insulation option to put in. Blanket insulation is designed to be easily cut on the spot to fit between studs, beams, and joists in unfinished walls, floors, and ceilings. There should also be a snug fit – but not too jammed – in the irregular spaces around electrical outlets, wiring, and pipes. Blanket insulation is usually made with fibreglass. You can also use cotton, which is a greener option sourced from denim and textile plants. Rockwool is made from recycled materials and is easier to install because of its shape resilience between studs.


Foam boards

Foam boards are often made of polystyrene, polyurethane, or polyisocyanurate.  With this heavy-duty insulation option, you can install them practically anywhere in the house. Most importantly, foam boards have a very high insulating value that can cover both interior and exterior walls. It’s more effective to use them on large surface areas though so that’s a drawback in an existing house without a major renovation.


Loose-fill

You should use the loose-fill option only as a supplement to more structural insulation rather than as a standalone. Specialised equipment blow or pour loose fibre particles into awkward spaces to fill up any insulation gaps. One common fibre particle material is fibreglass, suitably lightweight for attic ceiling applications. Another material is cellulose, a denser combination of recycled paper and cardboard for walls and floors.


Spray foam

Spray foam is also made for tight spaces, but has a higher insulation value than blanket insulation. The great thing about spray foam is that you can scale it up to cover large surface areas, too. Spray the polyurethane foam out in liquid form it’ll quickly fill up the space around it before hardening into an insulating layer. For a lighter, cheap option that creates an air barrier, you can go with open-cell spray foam. If you want a denser option that creates both an air and moisture barrier, choose the more expensive closed-cell spray foam.


Many of these insulation options need professional installation and access behind finishings. For greater efficiency, your local contractor can combine the insulation fix with your next renovation. And don’t forget to apply for some funding beforehand if you’re on a roll to maximise energy cost-savings in your home.

Picking the Right Baseboards

admin

After you’ve covered flooring in your house based on the function of each room, it’s time to pick the right baseboards to go with it. From a practical point of view, baseboards help hide the gap between the flooring and the walls; for aesthetics, think of baseboards as the bridge that connects your flooring to the rest of your home’s interior design.


Just like flooring, there are also a lot of options to choose from for baseboards; unlike flooring, however, you can make your choice based mostly on their looks. Here are the different baseboard materials you can select:


Medium density fibreboard (MDF)

MDFs are made from wood fibres sealed together with a resin mix. This manufacturing technique allows them to be moulded into a variety of shapes. One of the most economical and versatile materials you can go with, MDF baseboards come to the shelf already primed to be painted. If you want your baseboards painted in a specific solid colour, then MDF is your go-to material since it’s specifically designed for a paint finish. The best way to decide on a paint colour is to choose one that matches the major colour in the room’s décor or one that contrasts with the major colour. By the way, don’t even bother staining MDF baseboards because it’s not worth the effort: although MDF baseboards are made of wood fibres, there are no natural wood grains to accentuate, which defeats the whole point of staining in the first place.


Natural wood

If you have your heart set on staining, then look no further than natural wood baseboards – they look especially good paired with hardwood floors. You can either get the less expensive softwood baseboards like pine and poplar or you can get the more expensive hardwoods like cherry, oak, and walnut. Pine and poplar have very fine wood grains that don’t stand out very much even after staining; however, they are great options to achieve that rustic look. You can even paint pine and poplar, too, after you’ve primed them, but if you’re going to do that, you may as well go with the cheaper MDF baseboards – you won’t notice much of a difference after a few coats of paint. For hardwoods with their deep grains, staining is the only way to go – and boy, what a visual impact they make when it’s all done. Stained hardwoods bring a classic elegance to interiors that’s at once timeless and warm.


Vinyl

Vinyl baseboards are manufactured in rolls and are applied with industrial glue – it’s one of the easiest baseboards to install. One major advantage vinyl has over MDFs and natural wood is that it can handle moisture very well. It’s also durable and weathers wear and tear much better than wood. The only downside is that they can’t be painted, but with the wide range of pre-set colours you can choose from, that may not be a problem.


Plastic

Plastic is another water-resistant baseboard material you can use. It’s versatile in available shapes and it can be made to imitate wood. It can even be painted in any colour you want if you use paint that bonds to plastic. With their easy installation and maintenance, plastic baseboards are a great choice that’s less expensive than both vinyl and natural wood – as long as you don’t mind baseboards that look…well, plastic.


Tile

Although not as popular as the other baseboard materials mentioned above, tile baseboards deserve an honourable mention. The truth is: they’re not popular only because they fit just with tiled floors and are expensive to install. If you have tiled floors though and don’t mind spending a little extra to put in tile baseboards, you’ll elevate your room to a pristine luxurious level. Tile baseboards are extremely durable and water-resistant after they’re sealed. They’re also maintenance-friendly and very easy to clean. What’s more, they make the room feel larger because they create the illusion of the floor tiles extending out and up to the baseboards. Tiled baseboards bring a feeling of palace magnificence that cannot be matched by any other material.


With baseboards, you can customise the material and even the shape or trim profile to whatever fits your style and budget. The only thing to keep in mind is to maybe only use water-resistant materials in the bathroom and high-humidity rooms; otherwise, go nuts with the look that you like!

1 2 3 4 5

WE LOOK FORWARD TO HEARING FROM YOU

Ready to take it a step further? Let’s start talking about your project or idea and find out how we can help you.

Close

REquest A Free Quote

Curabitur blandit tempus porttitor.
Sed posuere consectetur est at lobortis.


[recaptcha]

error: Content is protected!
Call Now Button